DIY Glitter Letters Using a Vinyl Stencil & Mod Podge
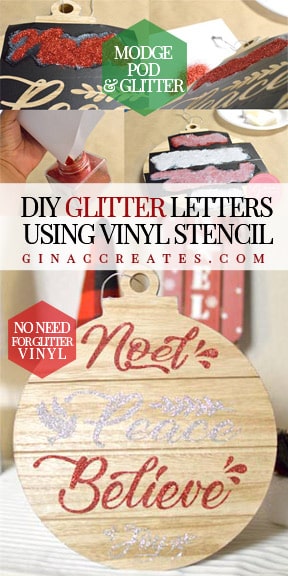
I created this beautiful glitter sign with zero glitter vinyl to weed. Although I may love how glitter vinyl may look, at times it can be hard to weed and my not be as cost efficient. Below I will show you how you can achieve the same look with out the hassle and cost.
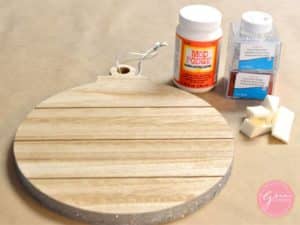
Supplies you will need:
(No glitter vinyl or HTV required)
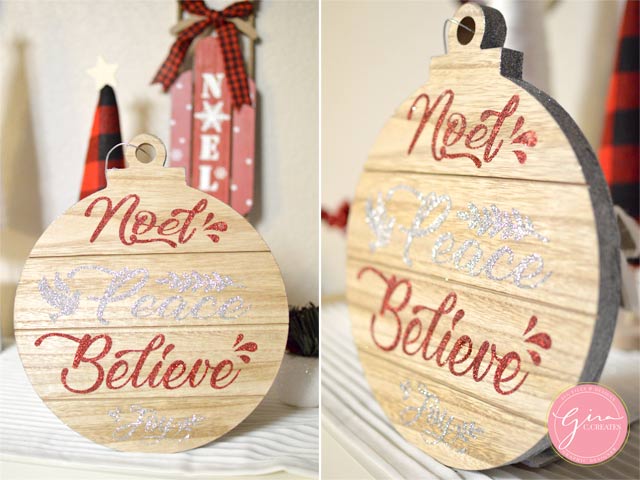
Start with your wooden surface, make sure it’s clean from debris. I grabbed this adorable 10 inch wooden ornament from Target in the Dollar Spot.
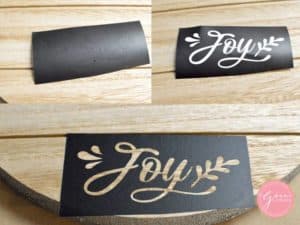
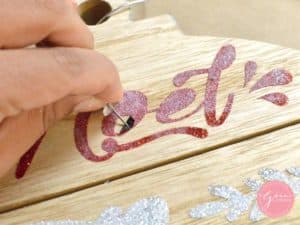
When you have your chosen design make sure when you cut your 631 vinyl to leave enough space around the whole design to use as a stencil. After you design has been cut on your machine, weed out the design part, like the picture shown. This should leave you with the negative space of the design. Use your Contact transfer tape and place it on your wood surface with no air pockets. Make sure the edges are firmly pressed down.
once you have your design in place, use your foam brush to light pat on the Mod Podge over design evenly. Then sprinkle on the glitter trying to only pour it over the design. Once covered completely, pour off excess of glitter on to a piece of paper and pour it back into your bottle for reuse. Wait 15 to 20 mins and repeat for a second coat. After your whole design is covered in glitter and excess was removed, pat on another Mod Podge layer to seal.
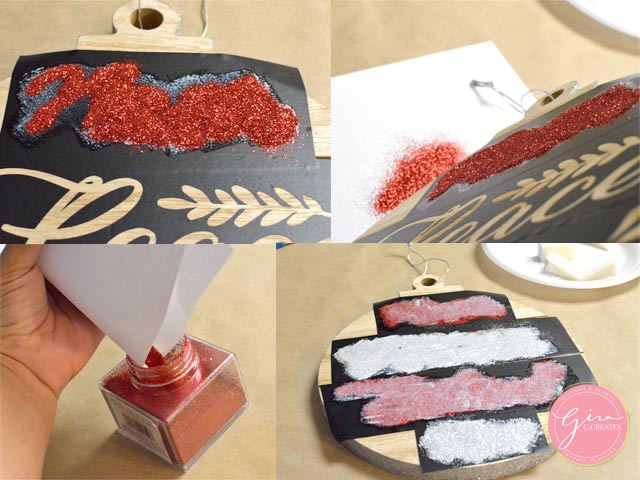
While still wet, remove stencil, and I used a needle to help with the weeding. Make sure not to smear your design. Let dry for 24 hours before handling.
Here’s the finished product! Looks awesome! I may have to try something else other than sliver on the second time around for more of a contrast, but still beautiful!!
I hope you enjoyed this tutorial and try this technique today!
Please share and pin to Pinterest!!


2 Responses
Is there supposed to be a download button for the images on this page? I’m not seeing it like on other pages to I wanted to make you aware…love all of your work!
https://ginaccreates.com/diy-glitter-letters-using-a-vinyl-stencil-modge-pod/
Hi thank you so much you’re very kind! This page is just a tutorial no free download. But I should remove my SVG terms on this post. Thanks for bringing this to my attention. 😉