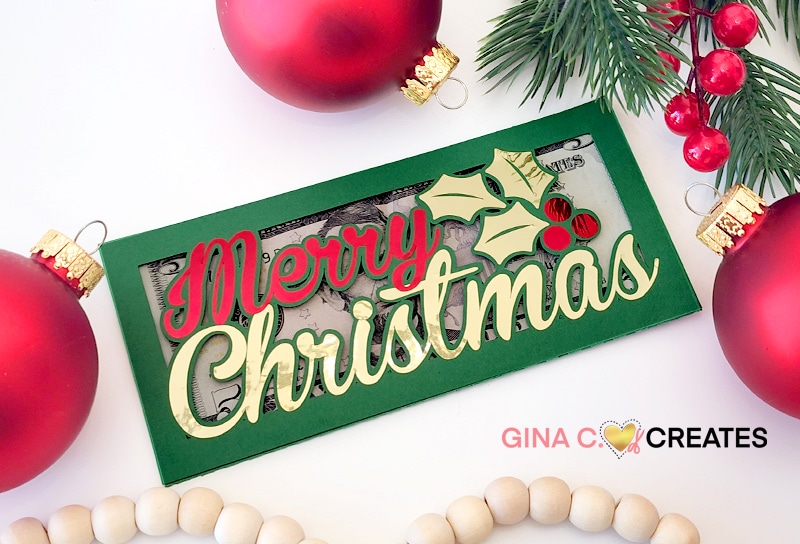
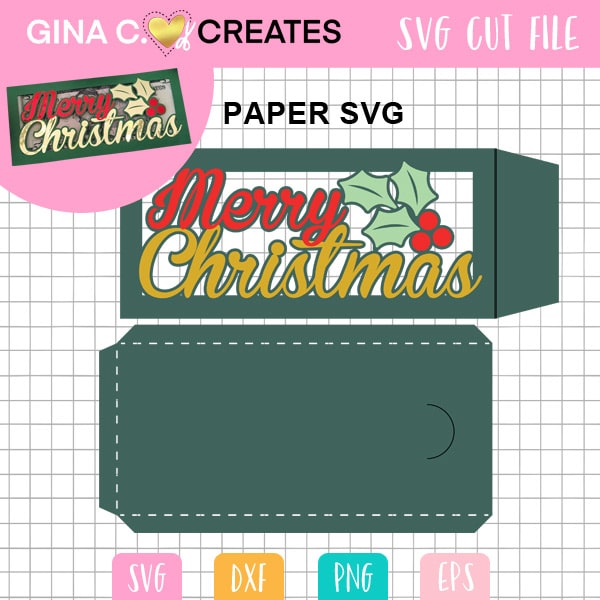
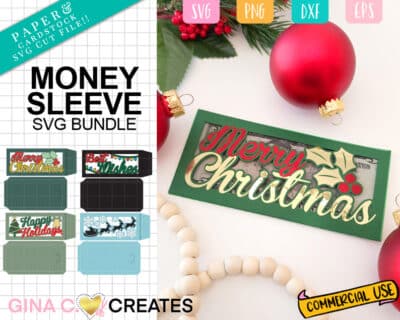
Welcome back my Crafty Friends! I have a brand new SVG design for you! I had many request for a Christmas themed money sleeve, after my Specials Occasion Money Sleeves were such a hit! I made this money sleeve a little bit different then my other money card holders. This Merry Christmas Money Sleeve SVG comes with a flap to close the sleeve, so the cash won’t slip out. I also created the Christmas design with an offset so you can layer on the design with colored vinyl or cardstock! This gives you more creative freedom to try out different colors or materials. Check out my Video Tutorial at the end of this post!
This Christmas Money Card can be made with your Cricut cutting machine using my free Christmas Money Sleeve SVG!! It will remain in my Forever Free Files and come with a personal use commercial license, that lets you create it for yourself or give it away as a gift. If you would would like to make these and sell them to friends and family, simply purchase a commercial license for this SVG design. I also created more Christmas themed money sleeves and packaged them in a SVG Bundle available in my Shop! Now let’s jump in on how to make this beautiful Christmas Money Sleeve!
Here are some basic instructions to make this money sleeve, for full instructions please watch my Tutorial Video below!
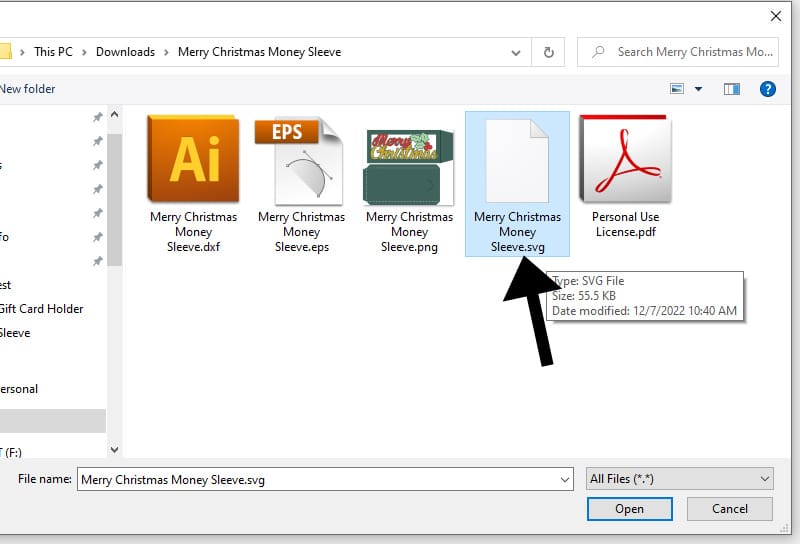
Upload the Free SVG file to Cricut Design Space.
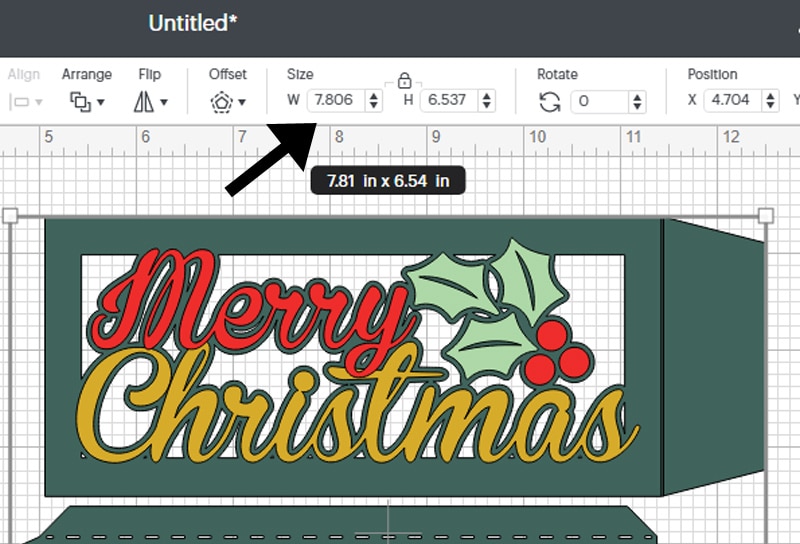
Add it to your canvas and make sure it is the correct size to fit US dollar bills. The overall width for this SVG should be 7.806 inches.
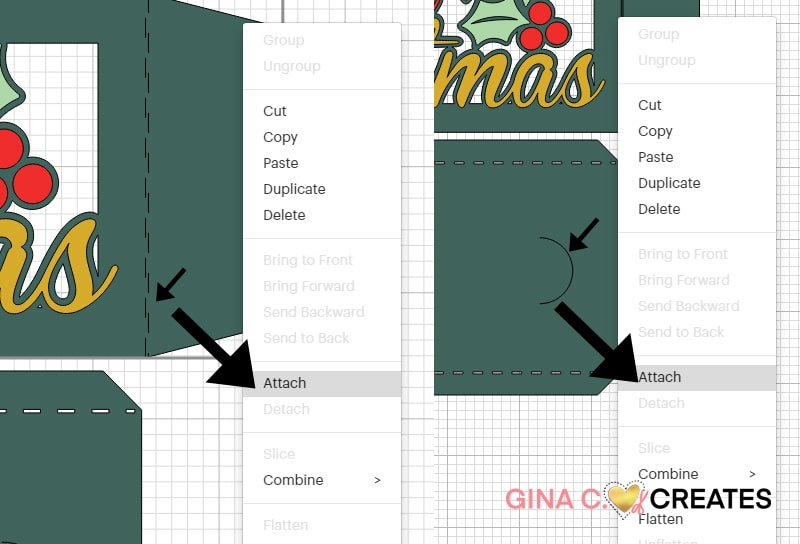
Ungroup the SVG and select the solid straight lines and change the operation from basic cut to score and attach to the shaper below.
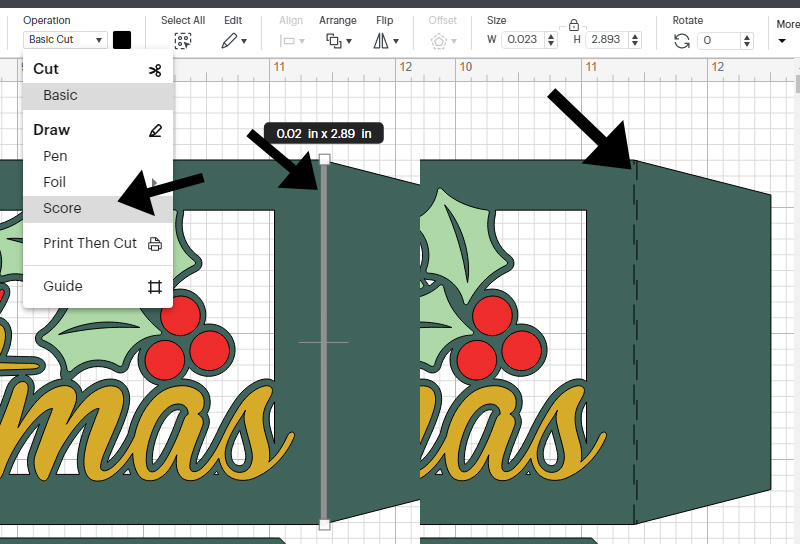
Also attach the half circle line to the shape directly below it.
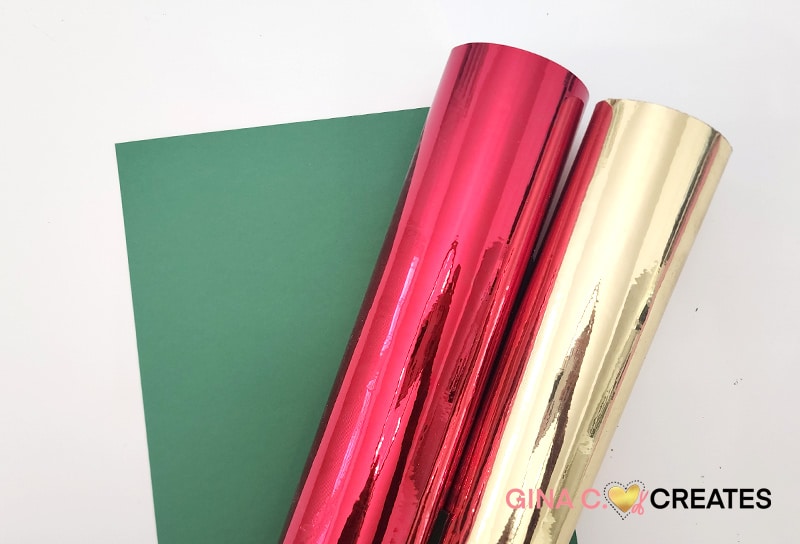
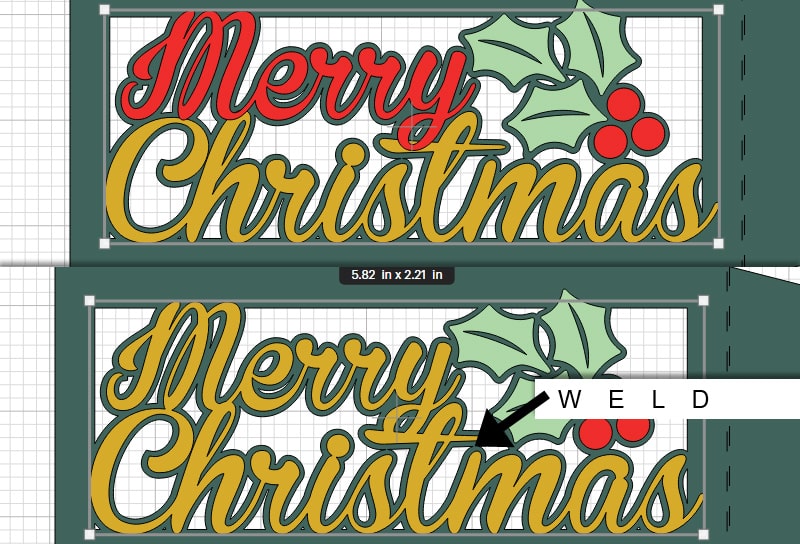
You can select the top layers of the Christmas design and change the colors. I you want the Merry Christmas one color, make sure to weld them together! Then you will be ready to cut. Make sure to adjust your dial to the appropriate setting for your material. I cut my cardstock on CARDSTOCK + and for my foil vinyl, I cut on CUSTOM > VINYL > FOIL ADHESIVE. Make sure to load the scoring stylus for your cardstock mat. If you do not have a scoring stylus you can score the flap with a ruler.
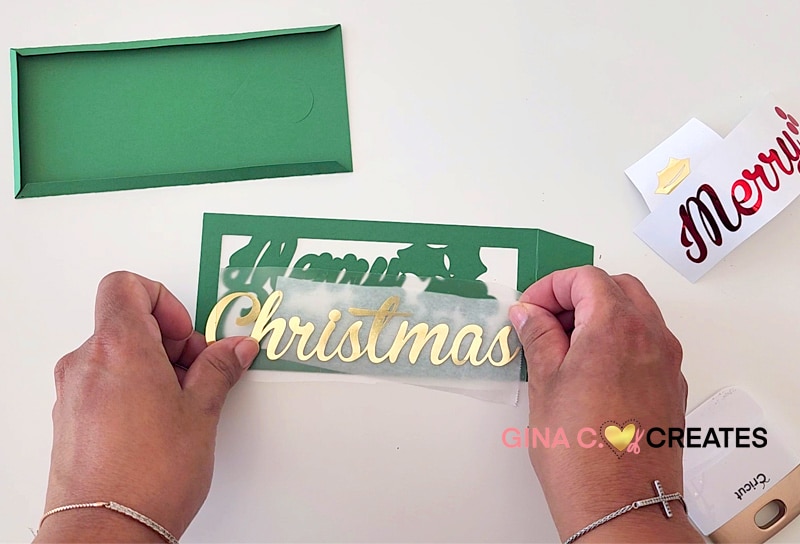
After you have all your layers cut out, you can now apply the Christmas design on top of the front sleeve.
Next, apply adhesive to the 3 tabs.
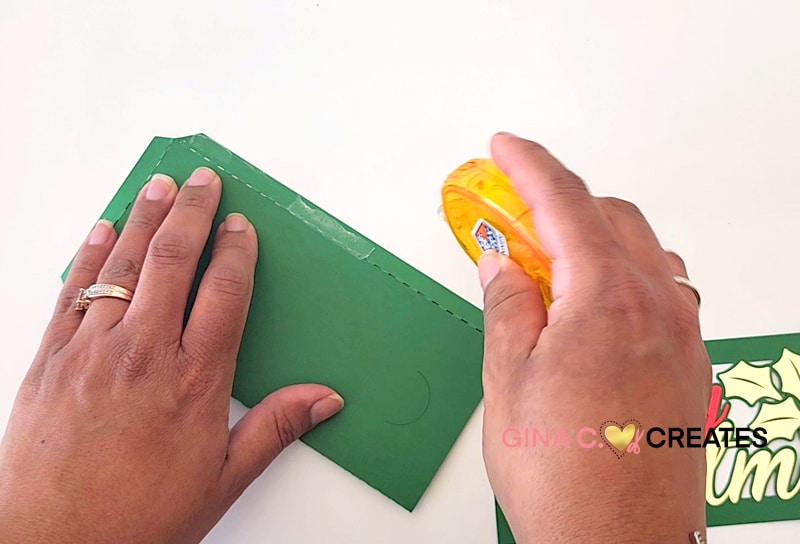
Fold the tabs in and apply the front of the sleeve.
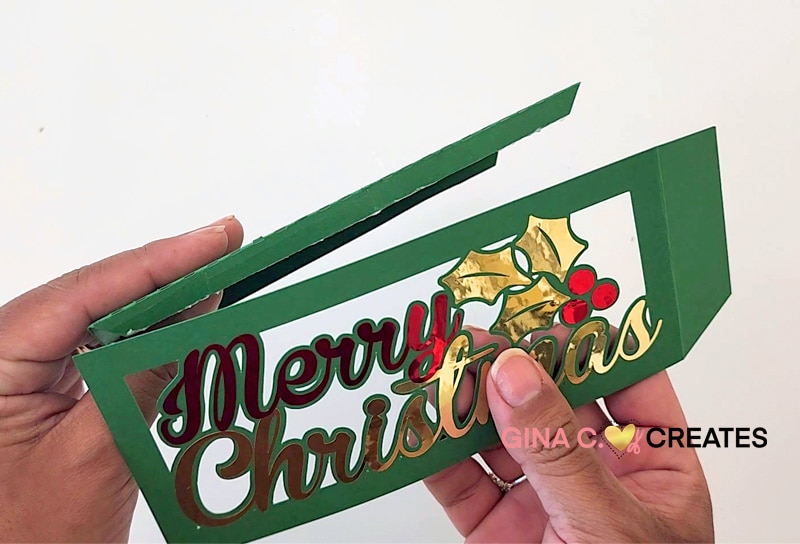
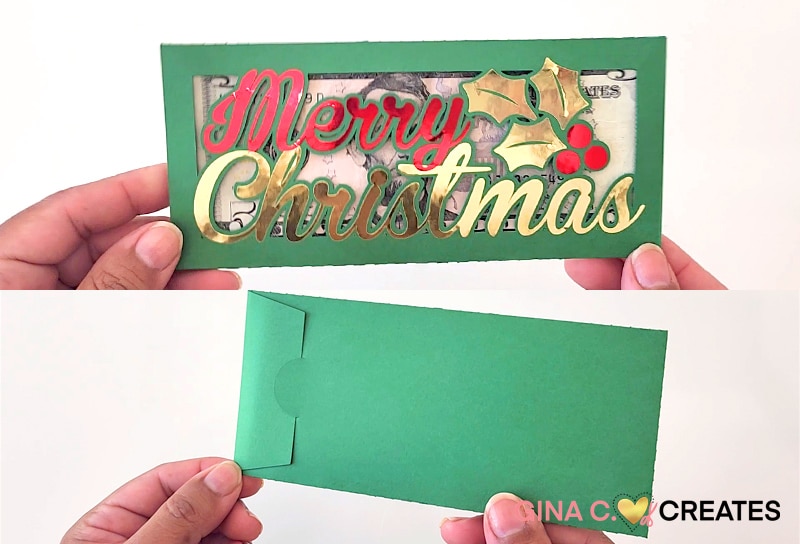
Let it sit for 10 mins, then you can add your cash and close the sleeve.
I hope you enjoy this Merry Christmas Money Sleeve, make sure to watch my full tutorial video below!
[embedyt] https://www.youtube.com/watch?v=VHNAGGwPxEM[/embedyt]Watch this tutorial video on YouTube!


5 Responses
when I unzip the files I see all file types except the svg. I can still upload it to cricut design space but it doesnt seperate all of the colors. I have to manually do that. Am I doing something wrong?
No you shouldn’t have to manually separate them if you use the SVG file. If you don’t see the SVG file type in the download, then it probably is displaying as an internet icon, html doc. I mention this in my video and I have more information about this on my help page. Sometimes the SVG file will display with a internet icon on Windows PC Computers. However it will still upload to Cricut because it is the SVG file. You can read more about that here: https://ginaccreates.com/q-a-troubleshoot/
Let me know if you need help.
I love all the money sleeves, i wish u did a father’s day 1 🙂
Oh my I can’t believe I forgot Father’s Day!! I will have to get that done! I planned on making them for every holiday and special occasion!
Lovely Christmas money card ! 🥰