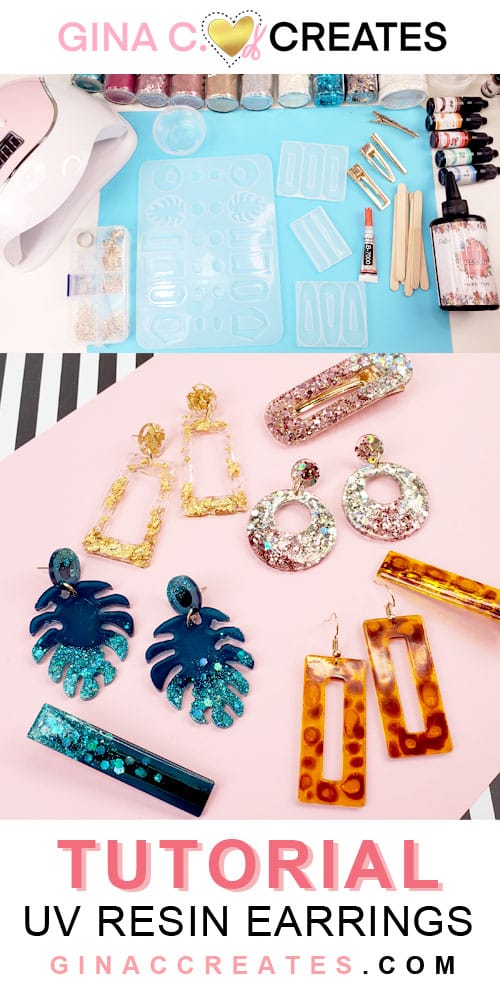
I have another fun tutorial for you, let’s create some UV Resin earrings and hair clips! If you haven’t tried out UV Resin yet, now is the time to start, with my step by step tutorial! Although you need some specific tools and supplies you won’t regret the investment! Once I got my hands on all the right supplies, I was addicted to this fun craft. You don’t need your Cricut for this one, but you can definitely add decals on these cuties if you wish!
UV Resin does have a chemical odor and should be used in a well ventilated space. Please use protective gloves and face mask. Make sure to read all safety labels on your UV Resin Bottle.
Now let’s get into the fun and start creating these beautiful accessories! Once you try out these kits, you will be more comfortable to try out different kits and the possibilities will be endless! Just scroll down to my video tutorial!
If you love easy DIY jewelry, don’t miss my step-by-step tutorial on how to make Shrink Plastic Earrings—a fun craft for all ages!

Cover your surface with parchment or a silicone mat. Wear gloves and a mask for safety.
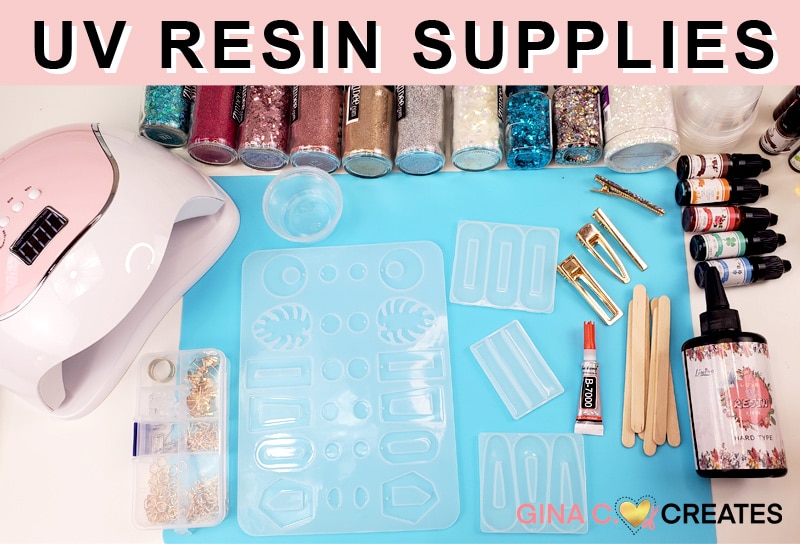
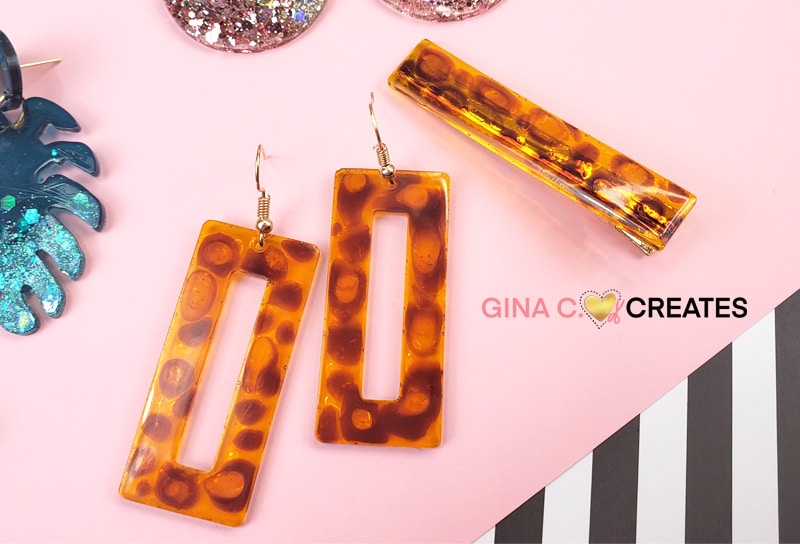
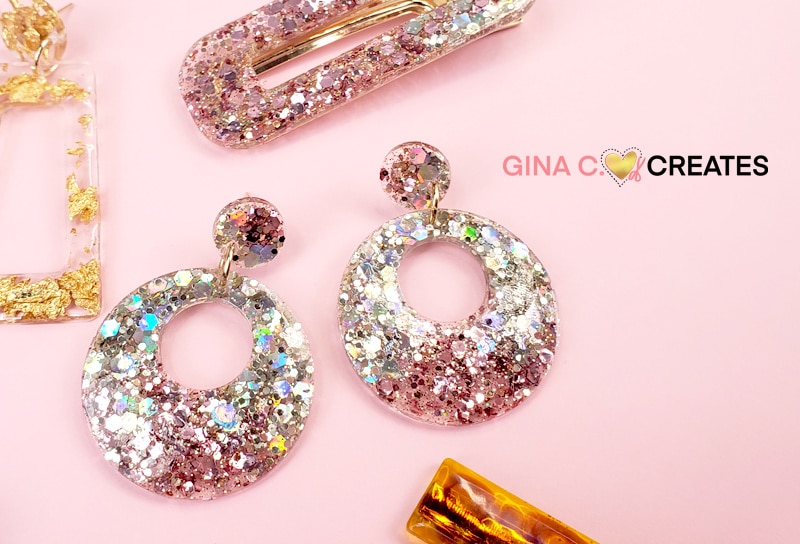
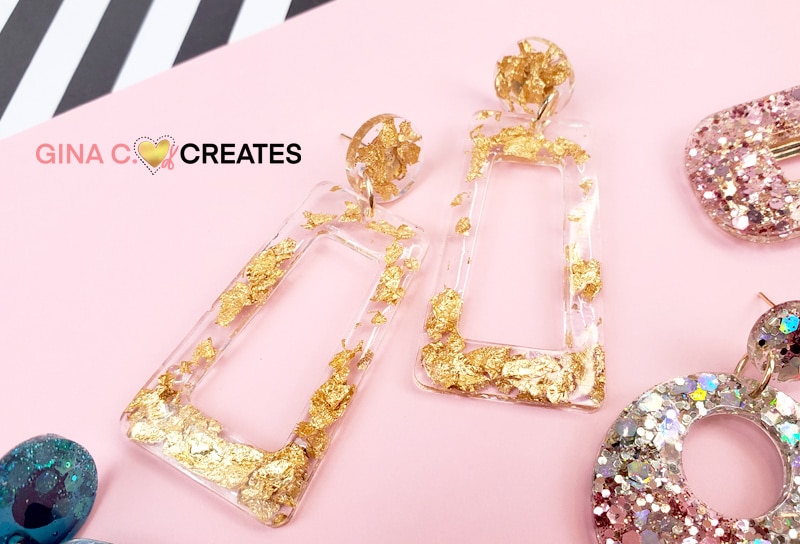
Pour a small amount of UV resin into a cup. Add pigment or alcohol ink and stir. Then mix in glitter or foil flakes for sparkle.
Use a toothpick or tweezers to add detail or layer elements into your silicone mold.
Slowly pour your colored resin into the molds. Don’t overfill—keep the surface level to avoid overflow.
Trending Ideas: Try marble swirl effects, ombré color blending, or embed mini charms or dried flowers.
Place your filled mold under the UV lamp. Cure each layer for 2–4 minutes. The resin should be hard, clear, and non-tacky.
Cure again if it feels soft or cloudy.
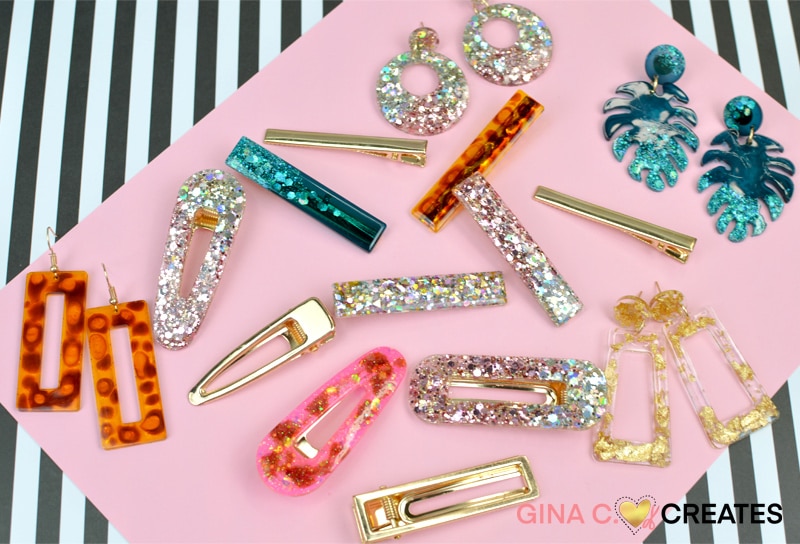
Once cured, pop your pieces out of the mold. If needed, sand sharp edges using a nail file.
Use UV resin or E6000 glue to secure earring posts or hair clip blanks to the back. Cure or dry fully.
Sharing to Pinterest, Facebook or Twitter, helps me tremendously by having others visit my post.