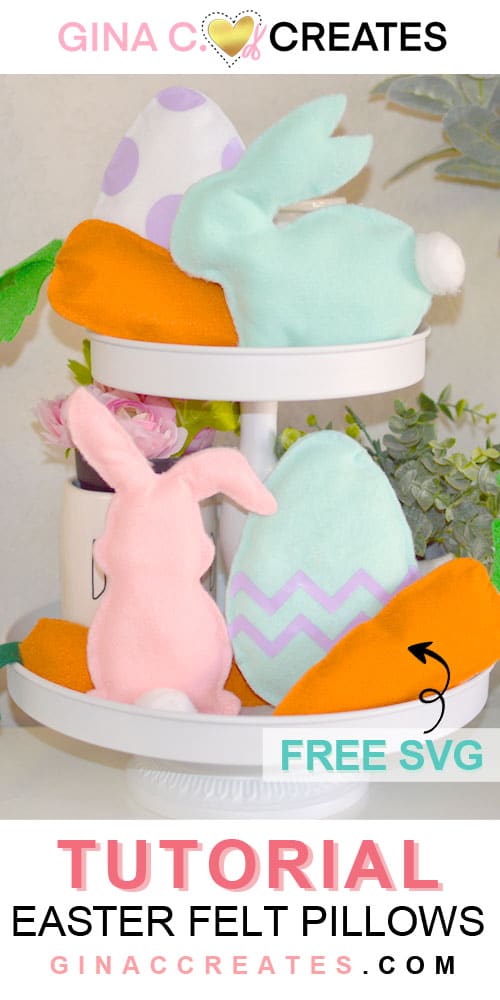
How to Cut Felt and make Mini Easter Pillows
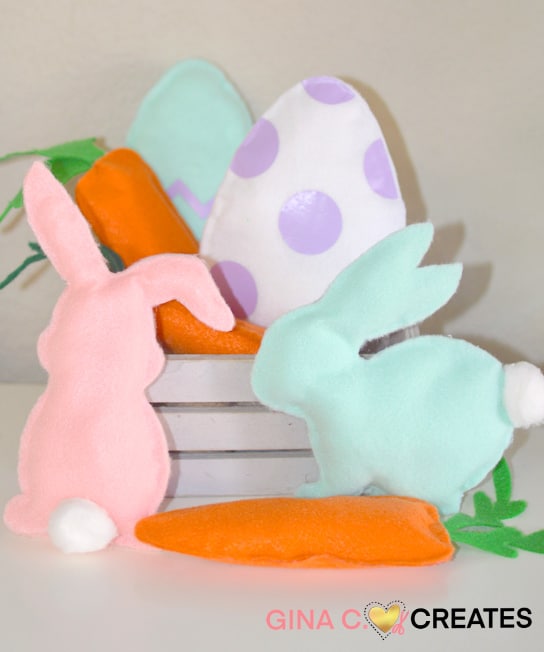
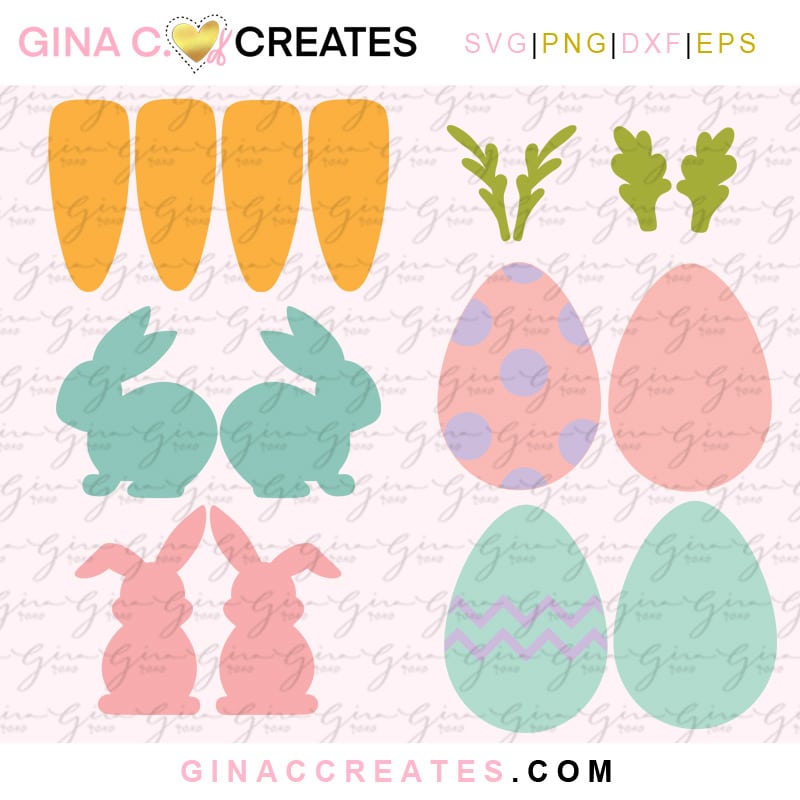
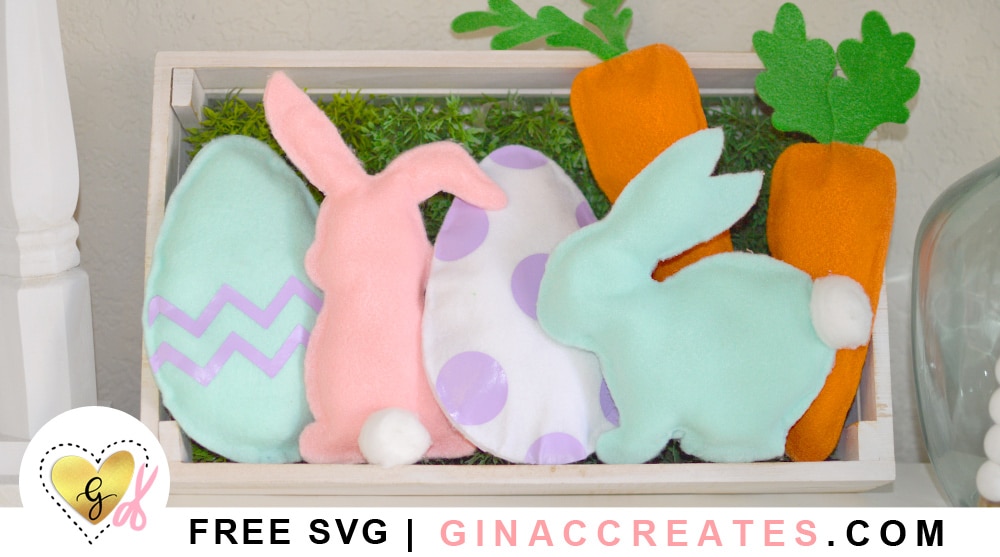
Hey Crafters! Today let’s make some Mini Easter Pillows out of felt! I designed a few SVG Easter items: Eggs, bunnies and carrots, free to download at the end of this post! They are all easy to cut out of felt and stuff to make little mini pillow accents.
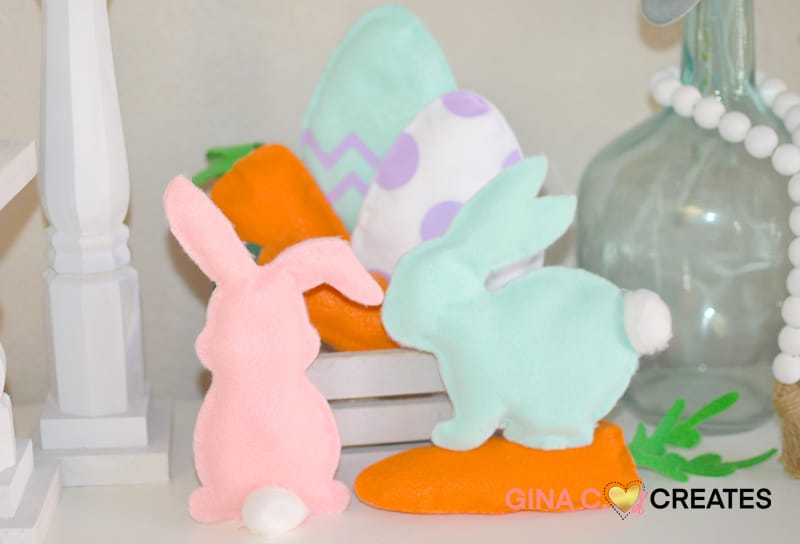
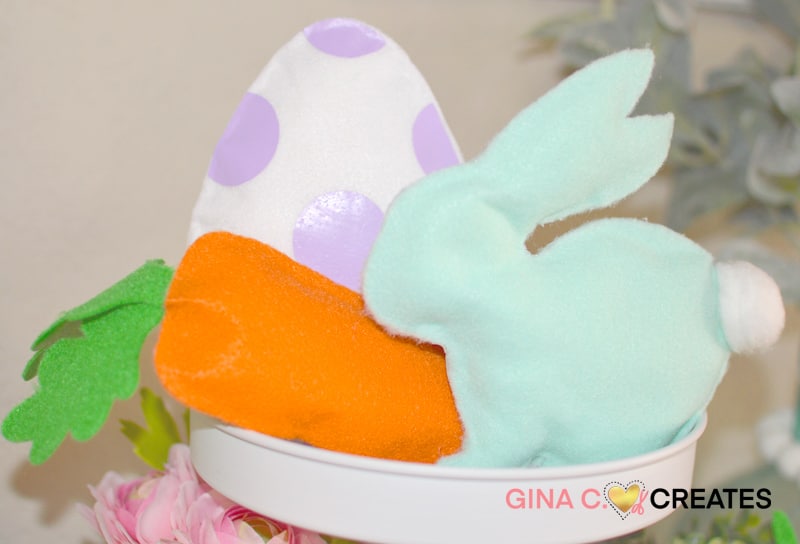
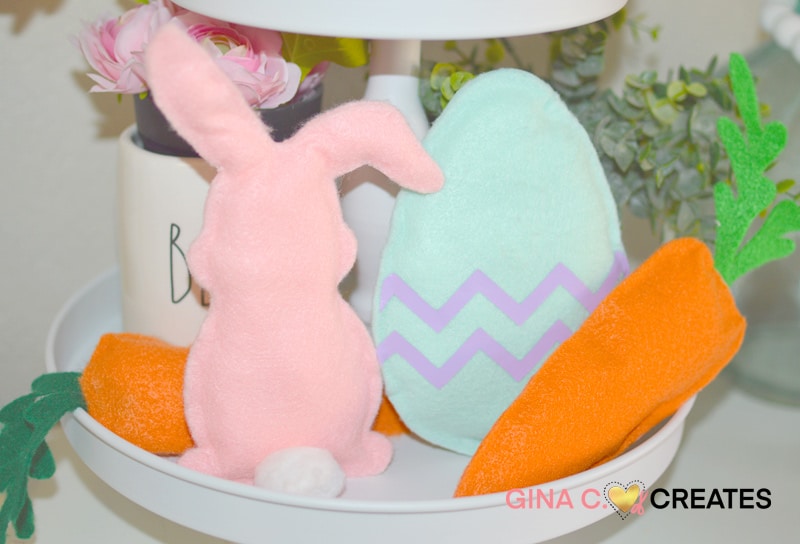
Use these cute Easter Pillows to make a garland, place on a tiered tray, or add to Easter baskets. How ever you use them, I’m sure they will look adorable!
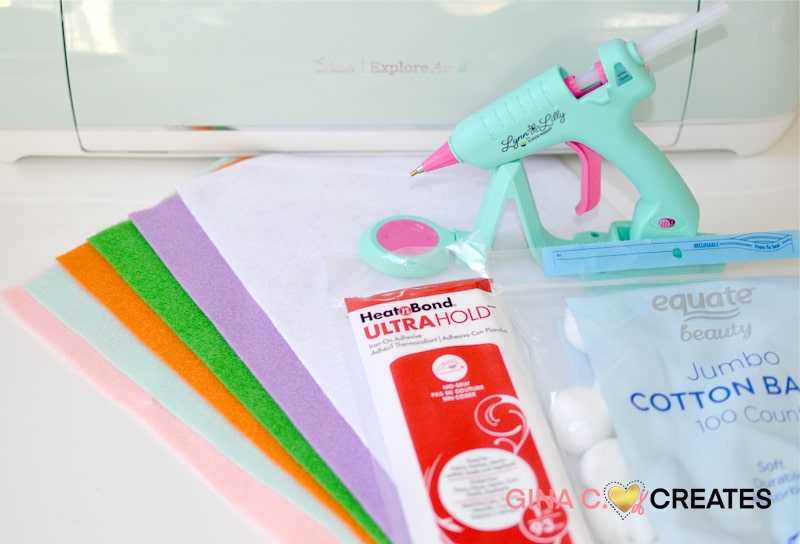
Here is a list of supplies:
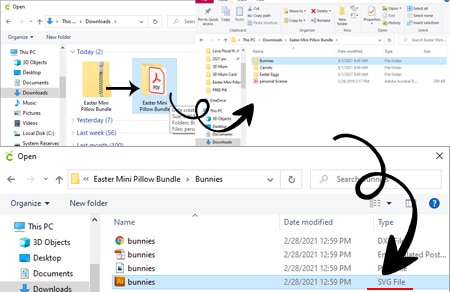
First thing is to download my free SVG file using the Pink Button at the bottom of this post. If you need help to download or upload the SVG, please read my Q&A page. Once downloaded extract all files and save. Open each folder and upload the 3 different SVG files: Carrots, Bunnies and Eggs.
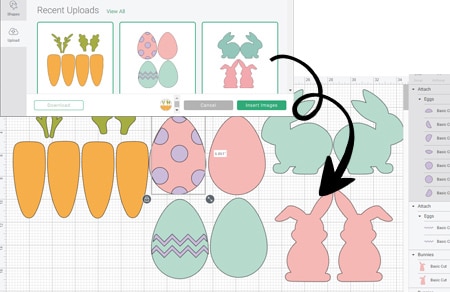
Insert all SVG designs into your canvas.
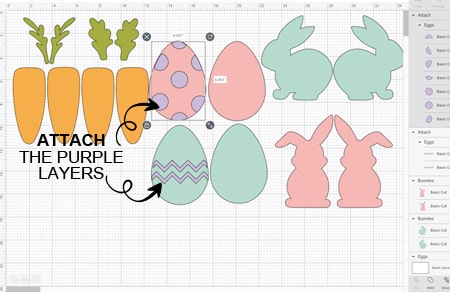
Ungroup the eggs and ATTACH the purple layers.
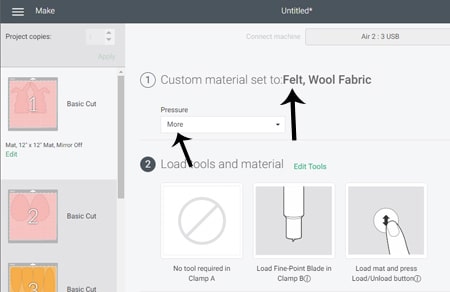
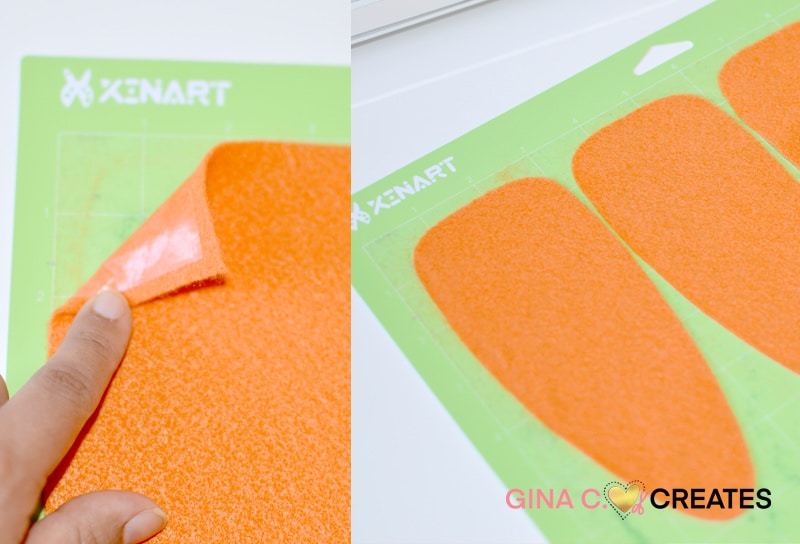
Set your dial to Custom > Felt, Wool Fabric > Pressure > More. To cut each felt sheet.
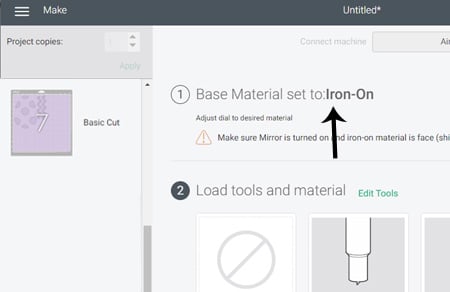
For the purple layers, I used Iron-on Vinyl so I can easily press it on to the felt. Make sure to Mirror this mat only.
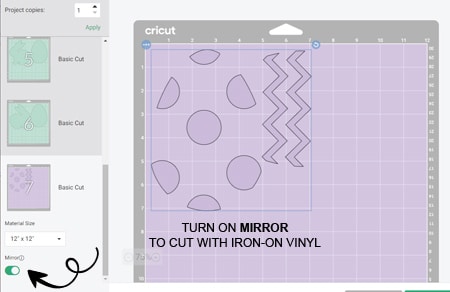
Also remember to change the dial setting to cut on Iron-on.
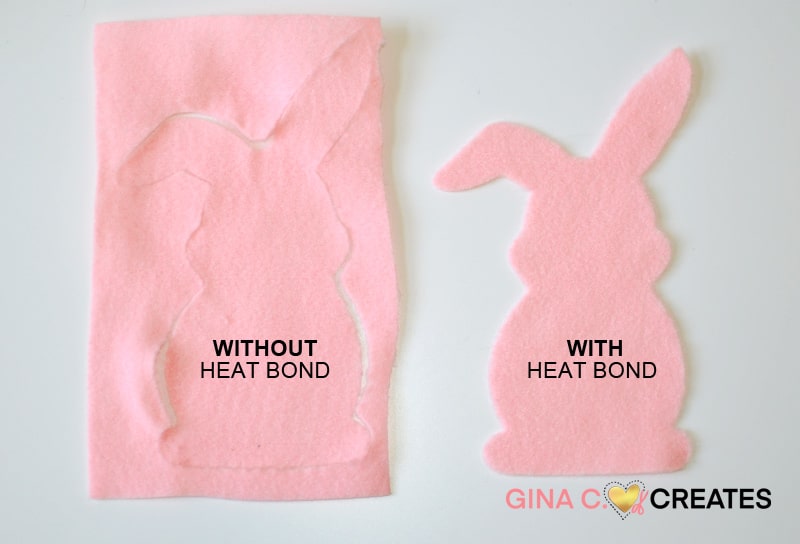
Now here is the most important step of cutting felt with your Cricut. USE HEAT’N’BOND!! It is a total life saver when cutting felt. Take a look at the picture below, cutting felt without Heat’N’Bond was a total nightmare.
This is how to use it! Heat’N’Bond comes by the yard, so you just need to trim it down to the size of your felt sheets. Then layer it over the felt, shiny side down and paper side up.
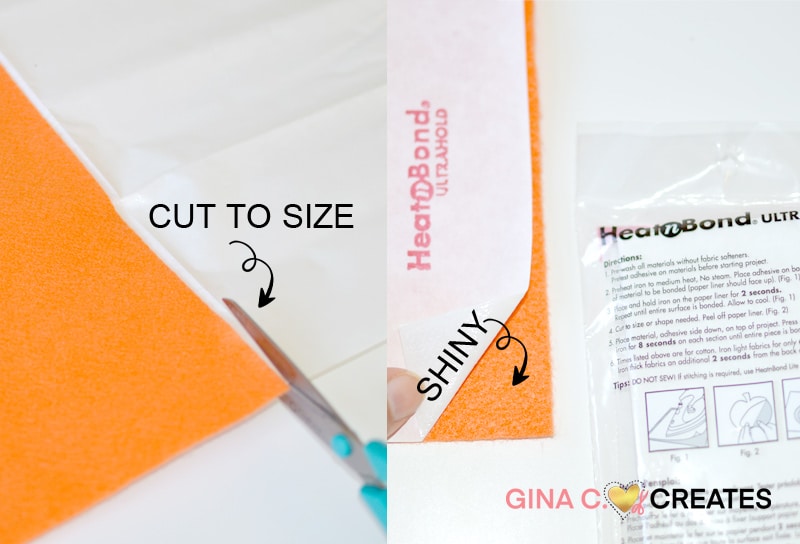
Use your HeatPress or iron to activate the adhesive to the felt. Press for 2 seconds at a time and remove paper backing. Save the paper backing for later.
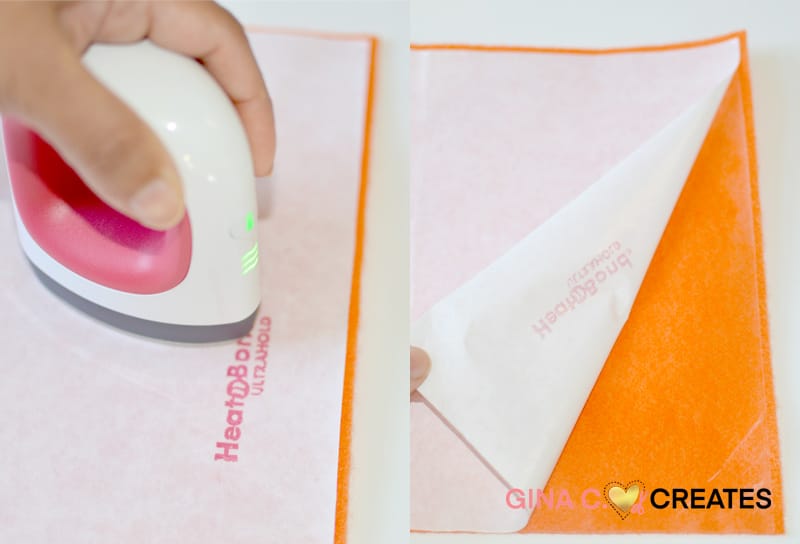
Place the felt shiny side down and cut on setting mentioned above.
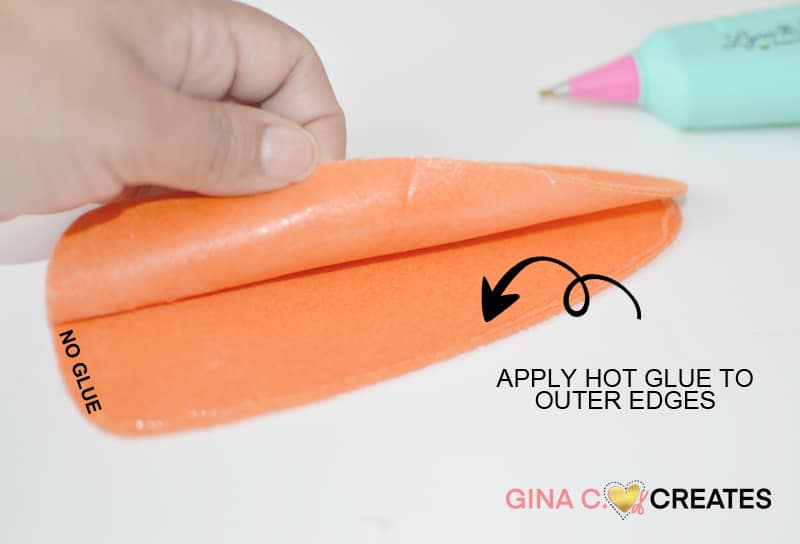
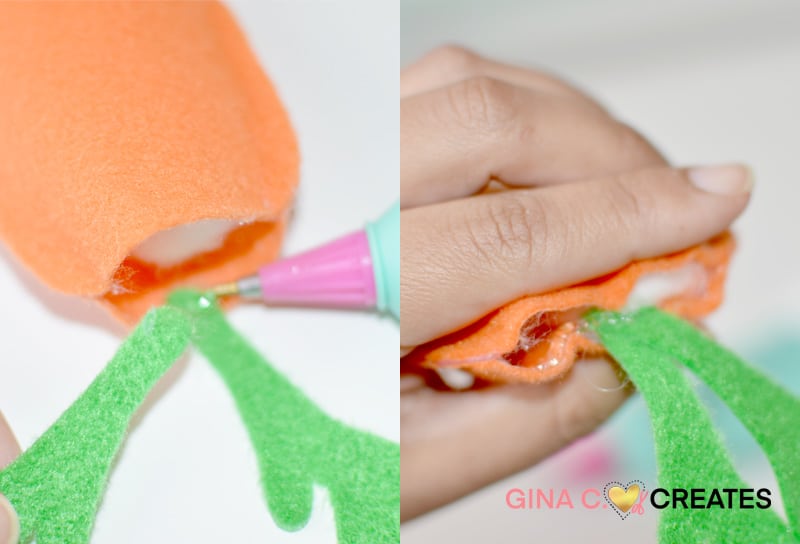
After you applied the Heat’N’Bond and cut out all the shapes, it’s time to use hot glue to attach the back piece to the front piece. Place glue along the edges but make sure to leave a small opening at the top of the carrot.
Once dried, stuff with cotton and use a stick to stuff it until it’s full.
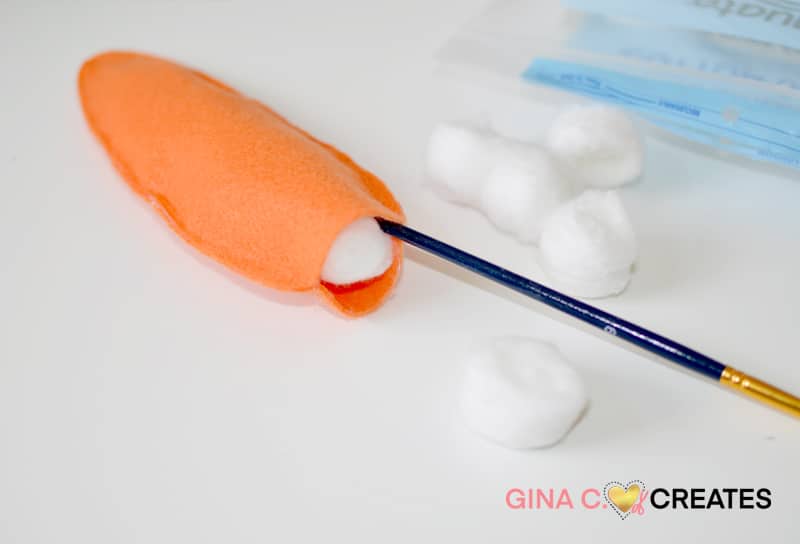
Add the green carrot tops and close with a line of hot glue.
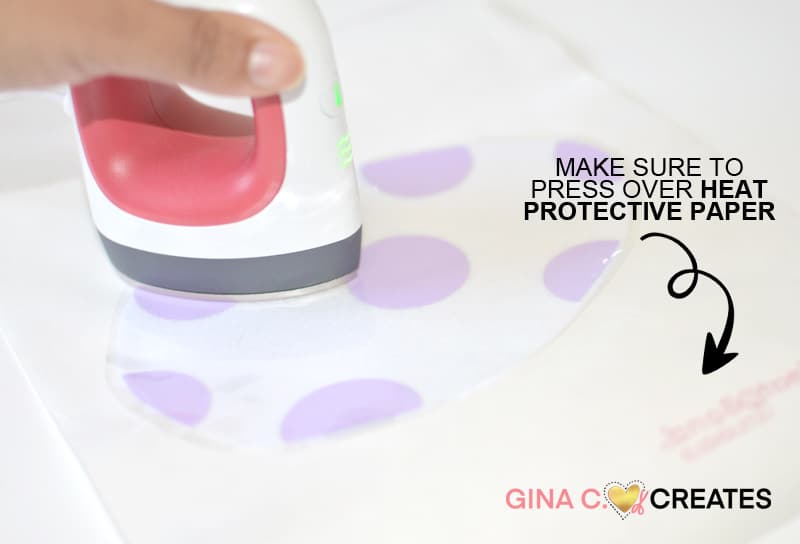
Take the iron-on vinyl and use your heat press adhere to the felt egg (not on the shiny side). Make sure to press over the paper backing to protect your surface from the adhesive on the felt.
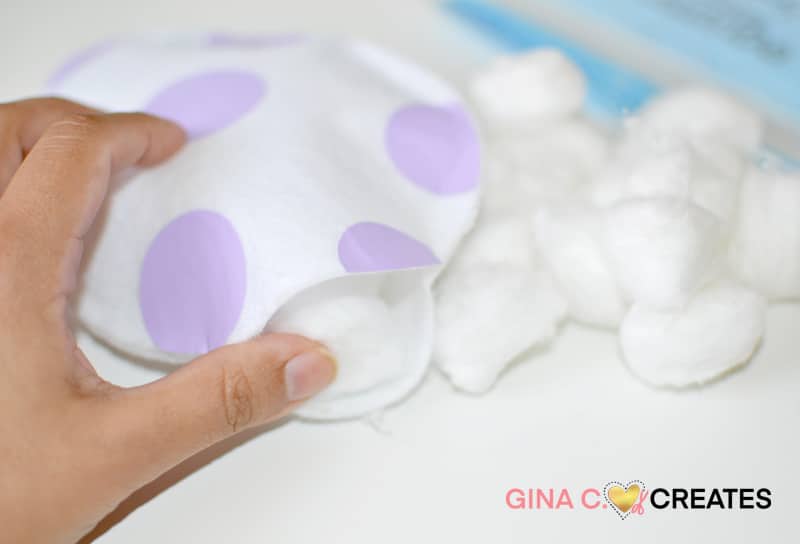
Apply hot glue to the edges and leave a small opening at the bottom. Then stuff with cotton. and close up.
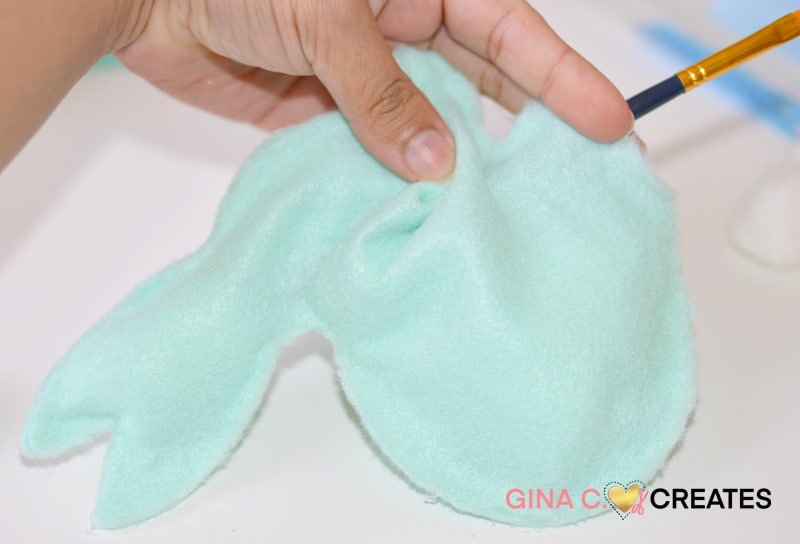
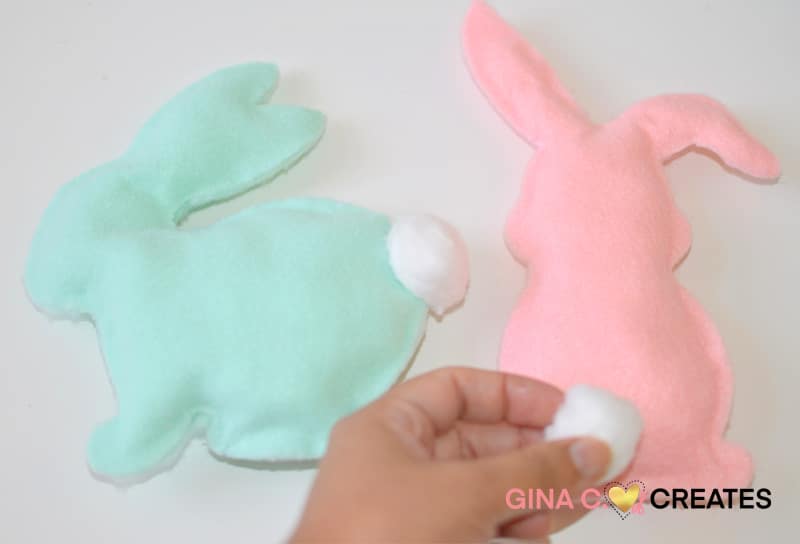
Repeat the same steps with the bunnies and make sure to use a stick to stuff cotton into the hard to reach spaces.
After stuffed and closed up, take a cotton ball and add a cotton tail with hot glue.
Now you have cute mini Easter pillow accents to decorate your home!!
I hope you enjoyed this Easter Craft Tutorial on how to cut felt!! Make sure to pin and save for later!!