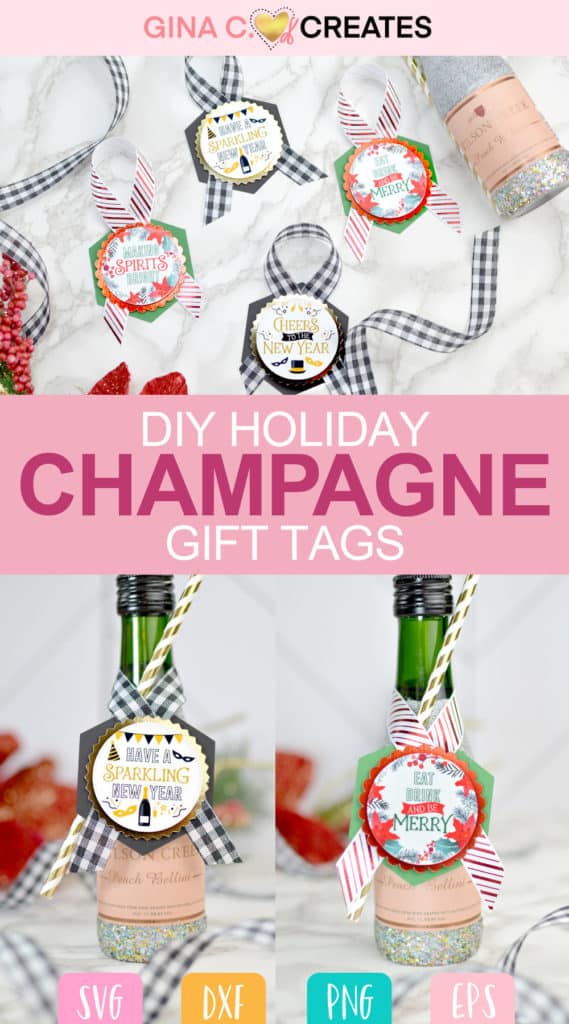
Holiday Party Favor | Glitter Champagne Bottle with Gift Tag Tutorial
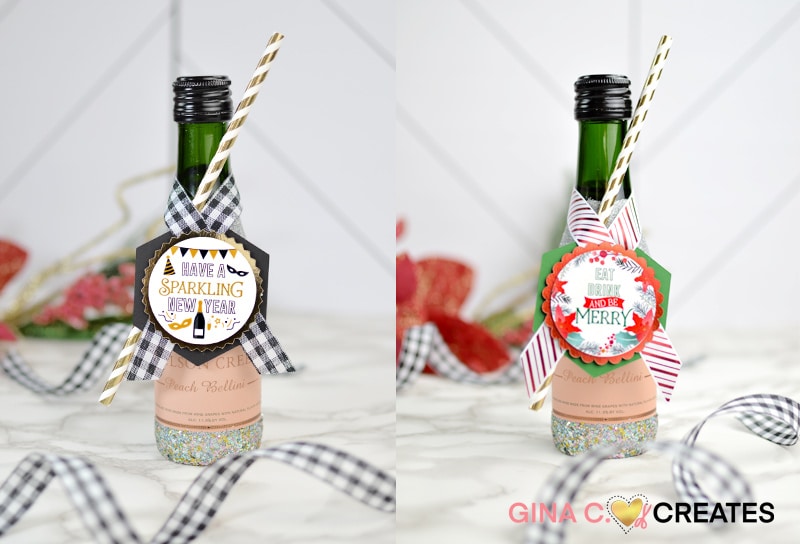
Tis the season to be crafty! I have a fun holiday party gift idea for you. Everyone loves glitter champagne bottles, so whether you are having a holiday party or you want to bring a gift to the hostess, this glitter champagne bottle with my holiday gift tags is a great idea.
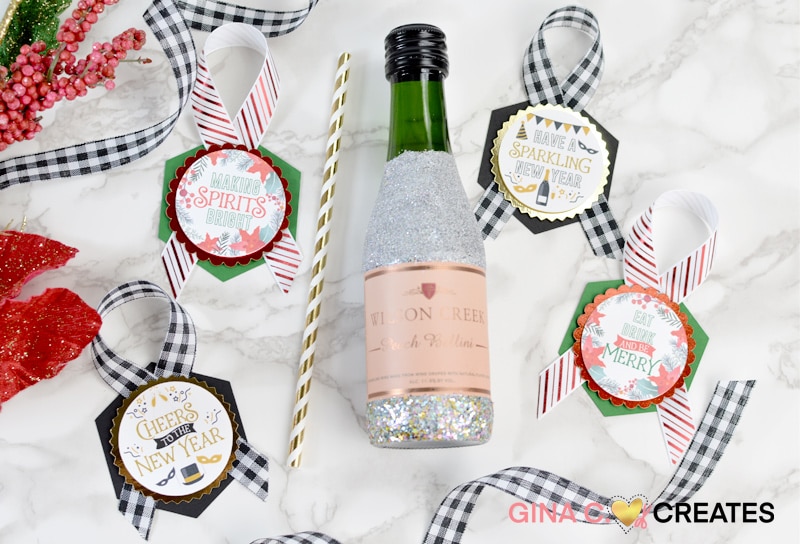
Try out my holiday tags on mini wine or champagne bottles with a straw for party favors! Make it a gift by using my holiday tags on a regular champagne or wine bottles for any holiday parties you attend.
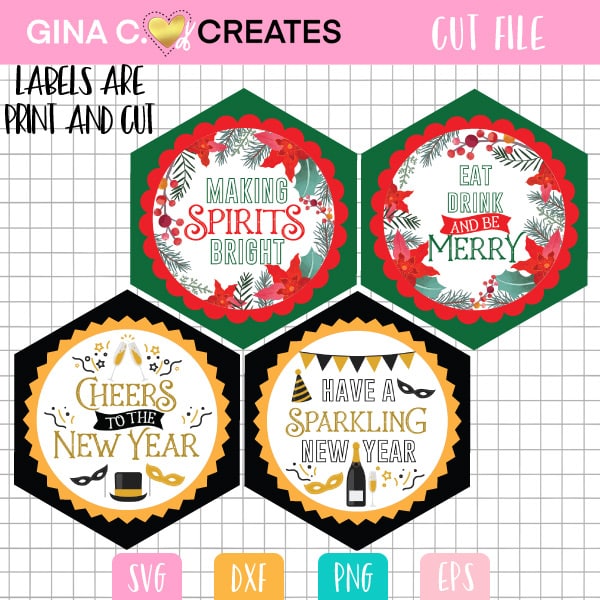
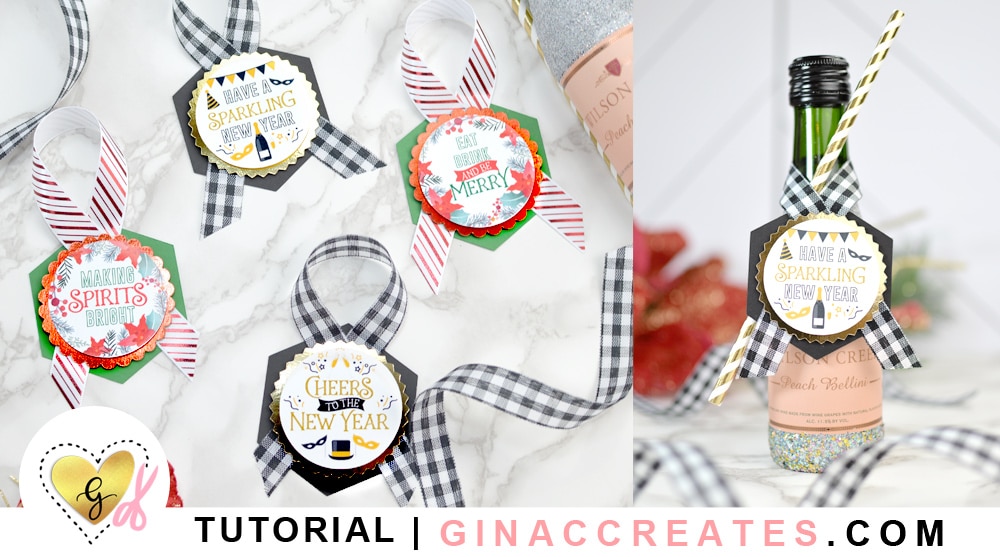
I will be showing you how to make mini glitter champagne bottles for your holiday party favors. The image below shows my two designs for each holiday, Christmas and New Year! I also included a black background for the labels if you choose to use. Christmas Champagne labels include: Eat, Drink and be Merry, Making Spirits Bright! New Year Champagne labels include: Have a Sparkling New Year, Cheers to the New Year!
In this tutorial, I will be using my Cricut machine and the print then cut feature. A printer is needed to achieve this holiday project. Now let’s get started!
Supplies you will need:
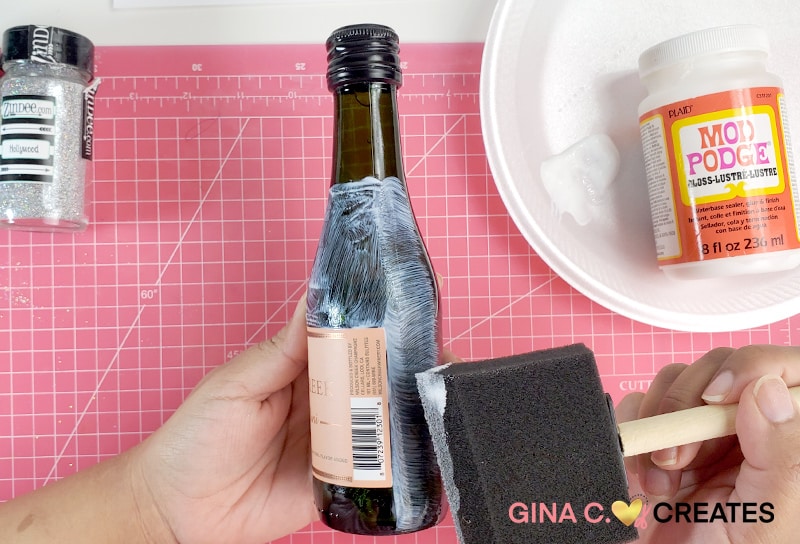
You can skip these steps if you don’t plan on covering your bottles with glitter.
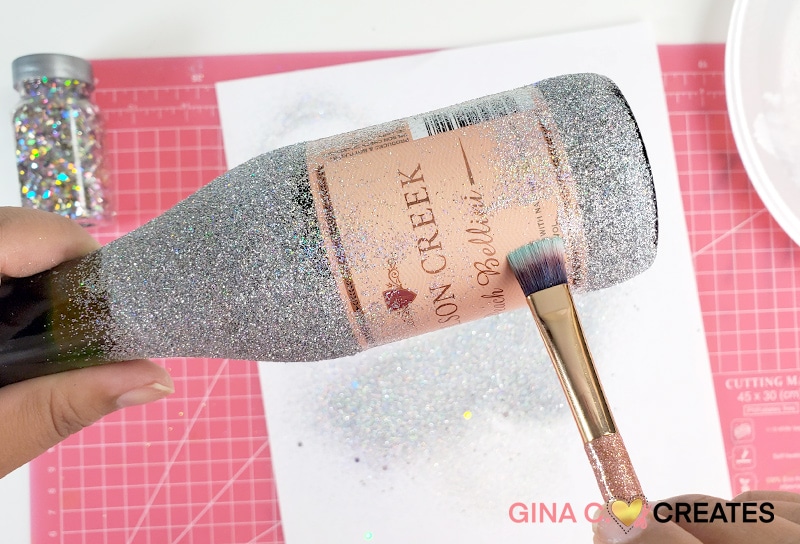
Let’s start off by covering the bottle with mod podge. Use your foam brush to dab on the glue. Make sure not to touch the champagne label.
Once you have a even coat of mod podge, cover it with your choice of glitter. I used Hollywood from Zindee.com. Metallic glitter show up best on dark bottles. I only had to do one coat.
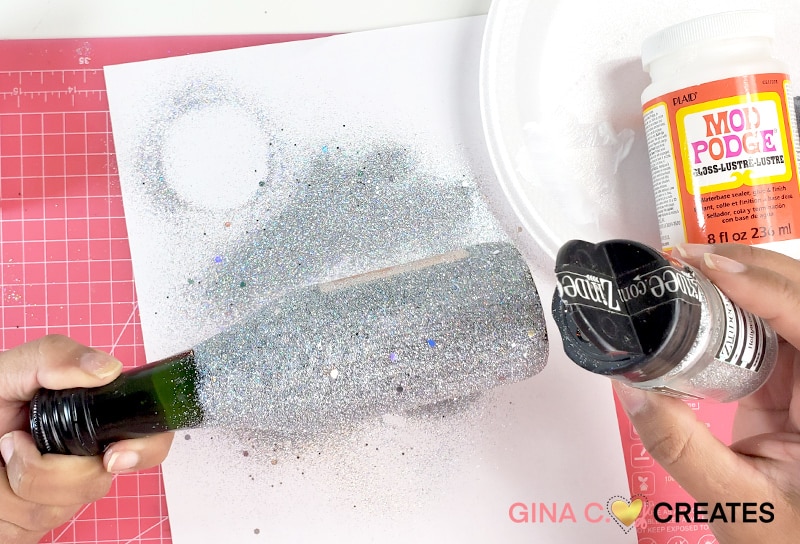
Clean off the extra glitter from the label with a small dry paint brush. Let it dry for 20 mins.
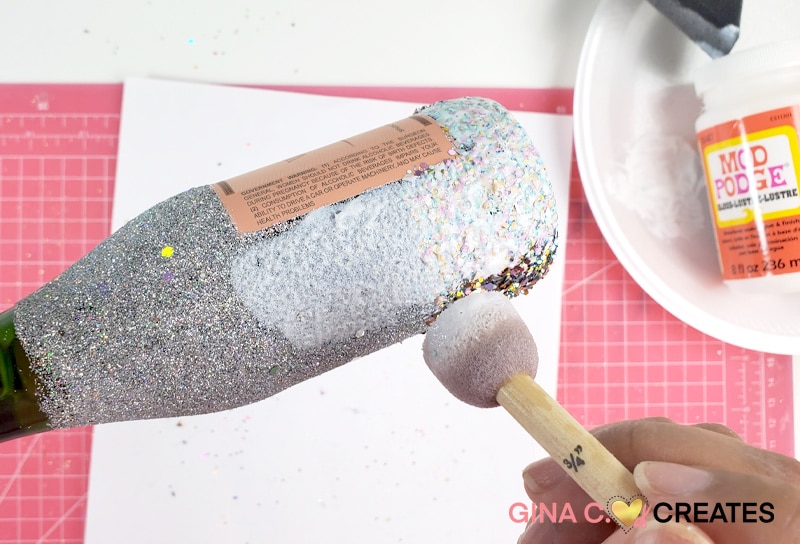
I’m going to add Circus chucky glitter along the bottom to give it more of a festive look.
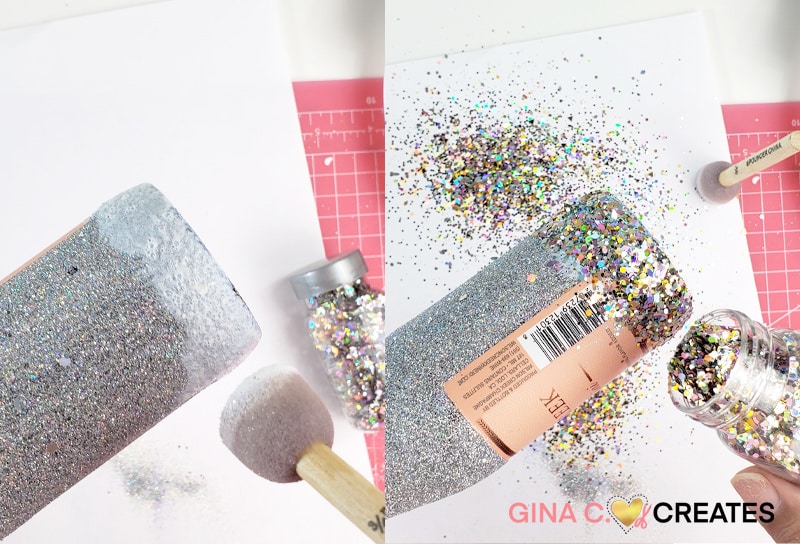
Then I’m going to seal the glitter with a coat of mod podge, this way you won’t have glitter rub off on your hands. Let dry over night before use.
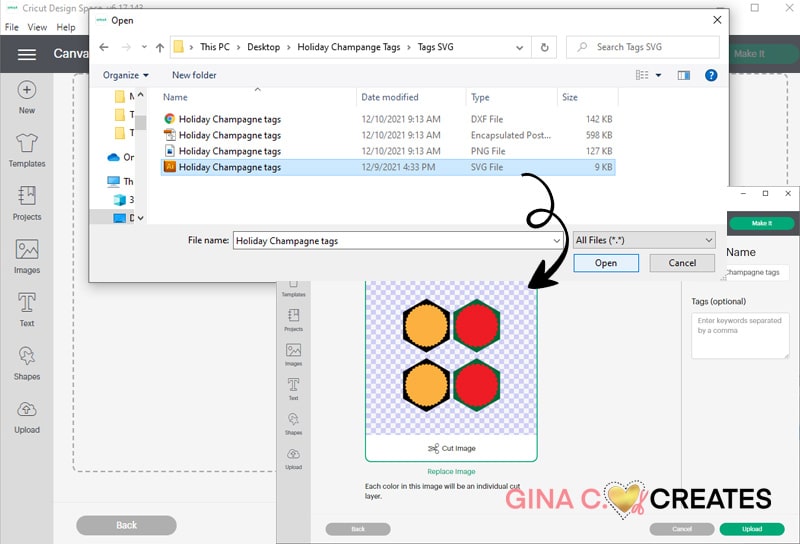
Once you have my file downloaded, you will first need to upload the Holiday Champagne tags SVG File. File might display as an internet HTML doc if you are on a windows pc. Save the cut file to design space.,
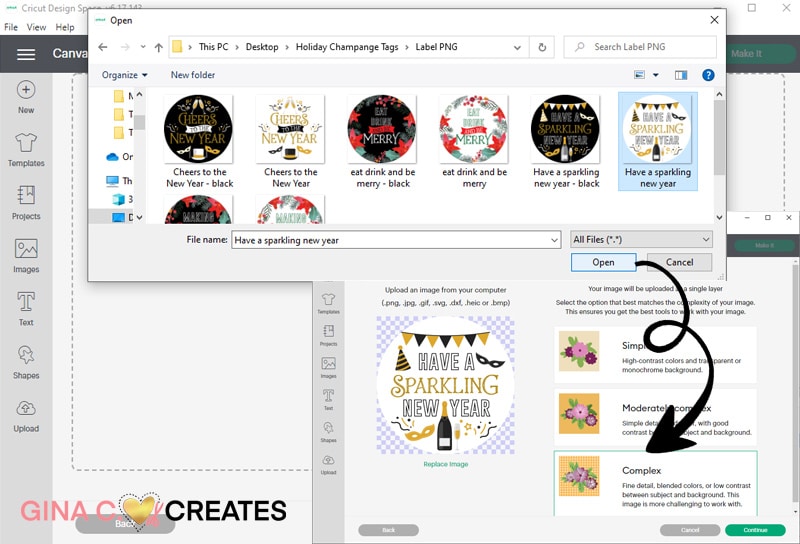
Next you will have to upload the second part of the holiday tag, which is the Label PNG files. Choose which labels you will like to use and upload them to design space. Design Space will ask you what type of image it is, choose Complex and press continue.
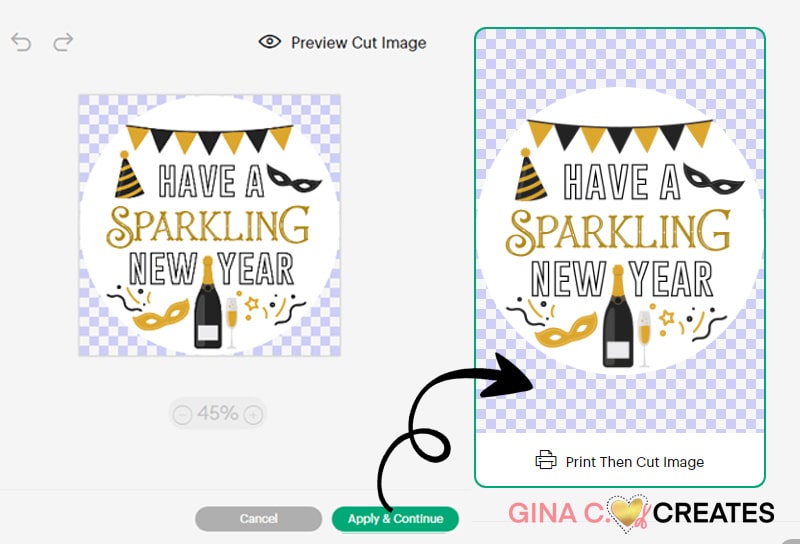
No need to clean up image, label is ready to go. Click apply & continue. Save as a Print then Cut image.
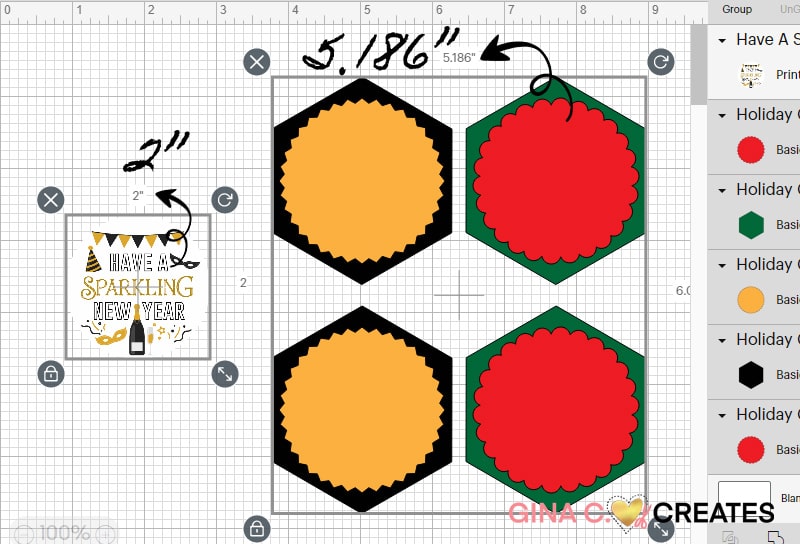
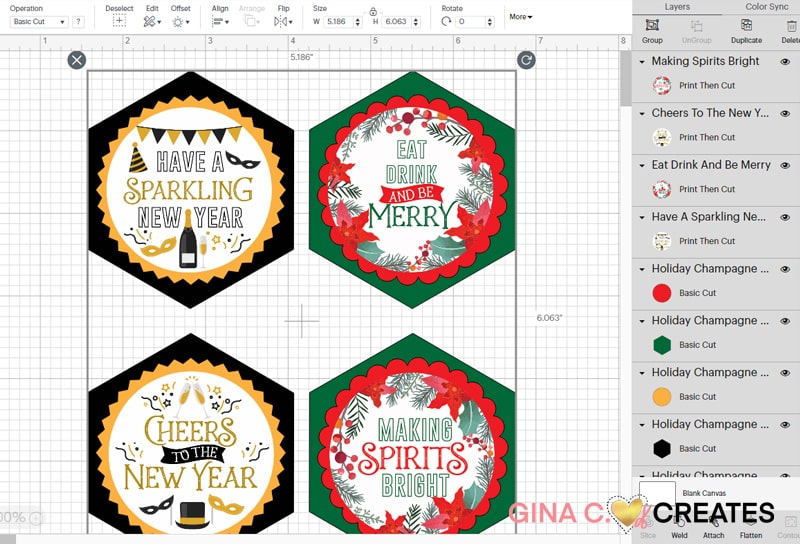
Add Holiday Champagne Tags SVG and Label PNG into your canvas. Add more labels if making more than one. Next you will have to make sure the SVG is the correct size. Due to Design Space, SVG files don’t always upload the correct size. So resizing may be needed. The overall SVG width is 5.186″, if it’s not that size resize it. For the print then cut circle label, resize it to 2″. Once you have everything the correct size you can ungroup the SVG and change the colors if needed. You can also delete any layers you don’t need. Copy and paste the Circle label if you want to print more than one.
Now I have my project ready to cut. Click MAKE IT at the top.
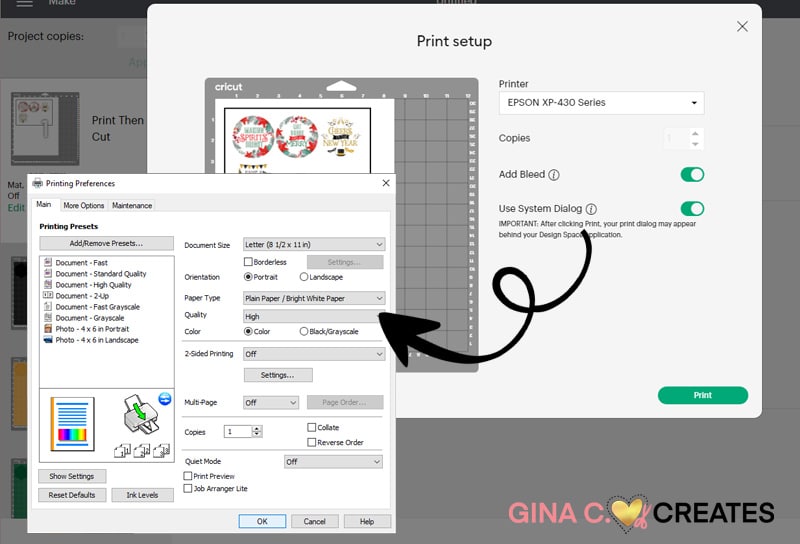
Leave bleed on. Turn on Use System Dialog, and change your printer settings to match your material. I am using regular white cardstock. So, I’m going to leave my paper on plain paper and change the print quality to high. Then click print.
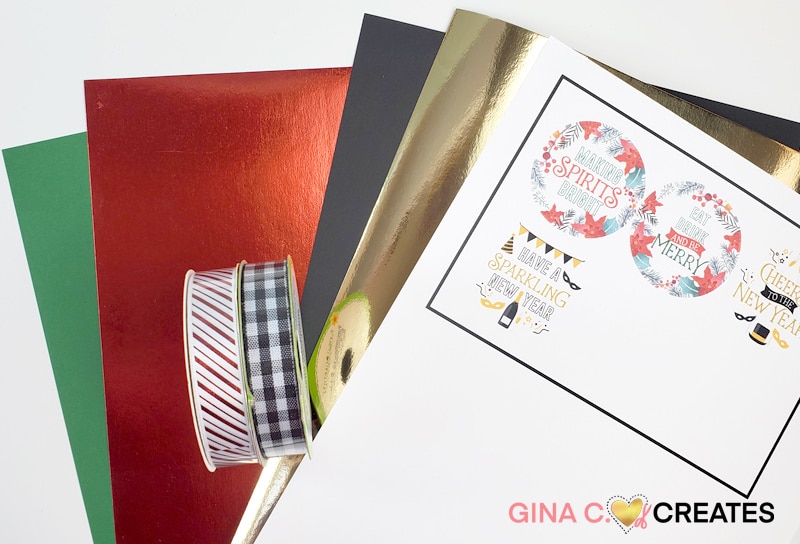
Here is the cardstock and ribbon I used. Each holiday tag will have one printed label, foil color cardstock and regular plain cardstock. For the Christmas ones, I used regular green and foil red. For the New Year ones, I used regular black and foil gold.
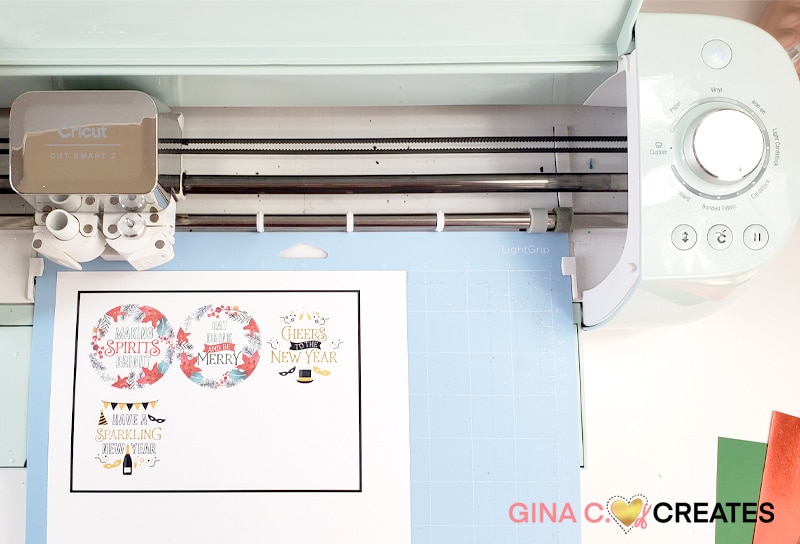
Once your labels are printed out, place it on your mat and load it into your Cricut. This is the Print then Cut feature. Cut on Cardstock+ to cut out your labels.
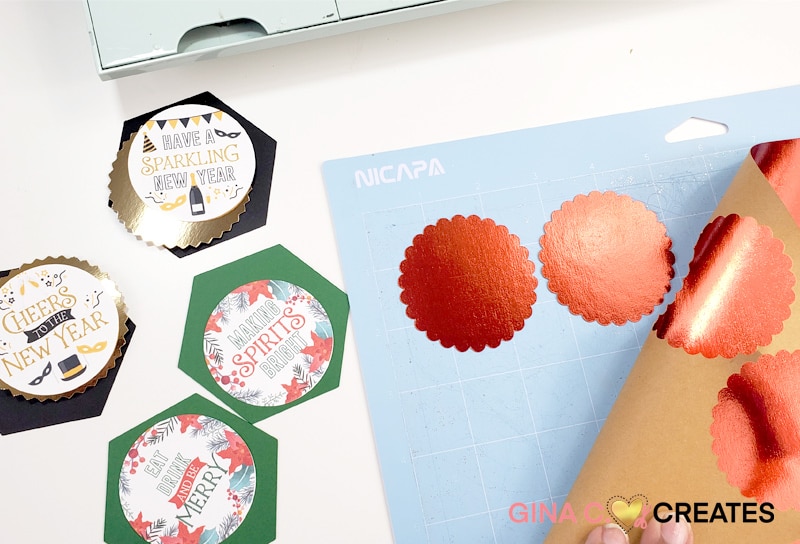
Finishing cutting out the rest of your mats with the color coordinated cardstock.
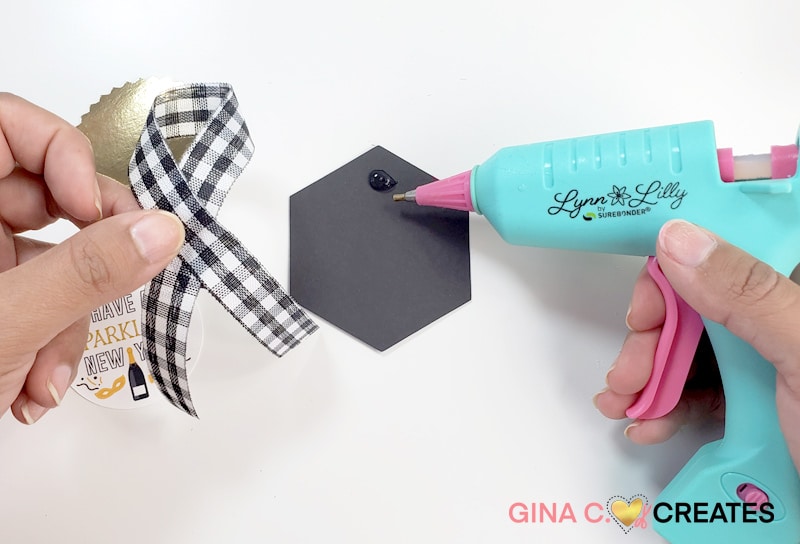
Cut your choice of 5/8 ribbon to 11.5″ long for the Mini Champagne bottles. If you are doing the regular size bottles cut your ribbon 13″ long. Each tag will have 3 layers along with the ribbon.

The bottom hexagon layer, add hot glue to the top of the shape to attach the crossed ribbon. Cross the ribbon on top of each other with 3″ of lack left on each side.
Next, lay foam tape over the ribbon and place the star or scalloped circle in the middle of the hexagon.
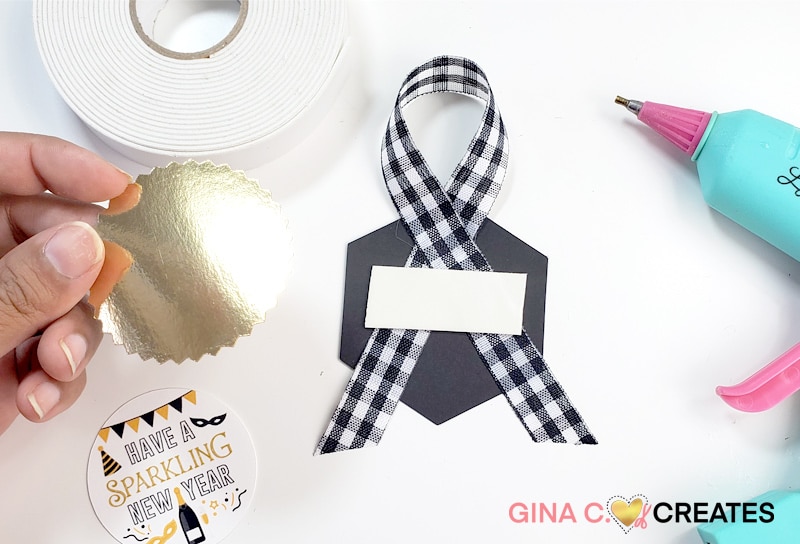
Next place your circle label on top of your star circle with foam tape.

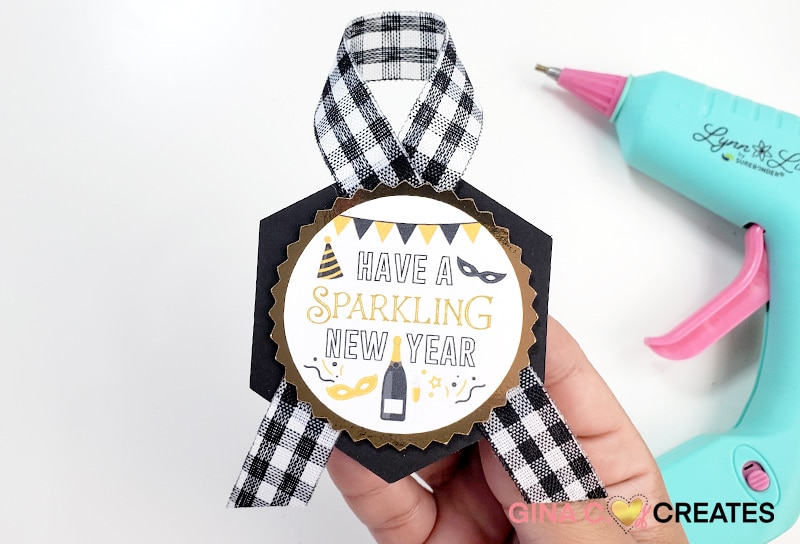
Now here is your completed tags.
Lastly, place tag on your glitter champagne or wine bottles and add straw if desired. I hope you enjoyed this tutorial and give it a try for the holidays!