(Note: This post may contain affiliate links. I make a small commission on any purchase you make, with no extra cost to you)!
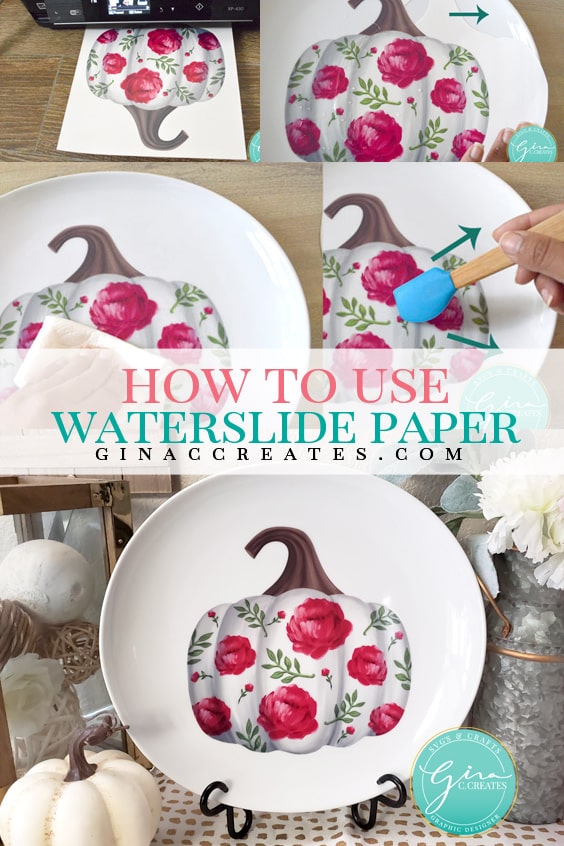
I have seen many water-slide decals before and thought how beautiful they look! I was a little hesitate to try out this technique because I didn’t know anything about it or where to start. But let me tell you it was much easier then I thought! Water-slide Decal paper is basically like tattoo paper but instead of flipping it over you slide the decal on with water. You can use it on ceramics, glass, jade, bamboo, plastic, marble, wood, and metal!
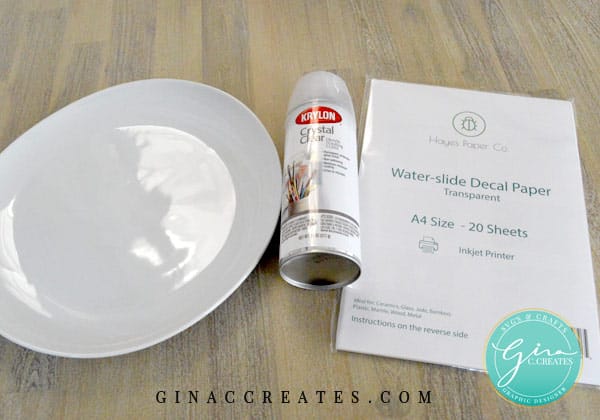
Here is a list of supplies you will need:
Optional List for cutting machine:
To be used with print and cut feature!
But, in the tutorial, I’m going to show you how to use without a cutting machine.
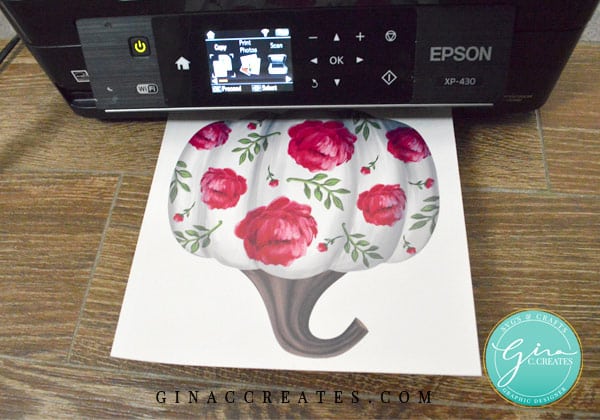
2. After you found an image you want to use, resize it to fit on your surface. Then print on the shiny side of the paper. Change your paper type setting to photo glossy paper and on high quality print. Let print dry for 3 mins.
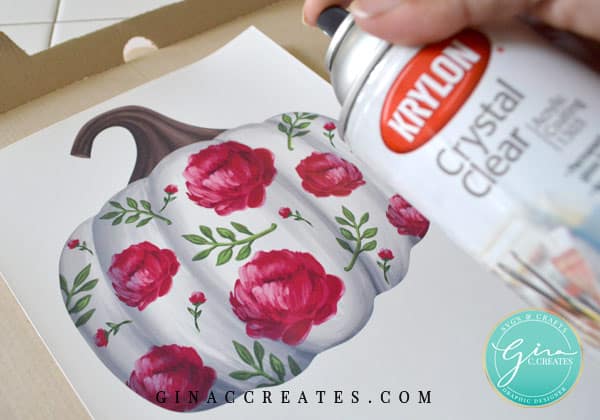
3. Spray Crystal Clear evenly over entire print. Apply 3 coats of spray. Let it dry for 15 mins in between coats.
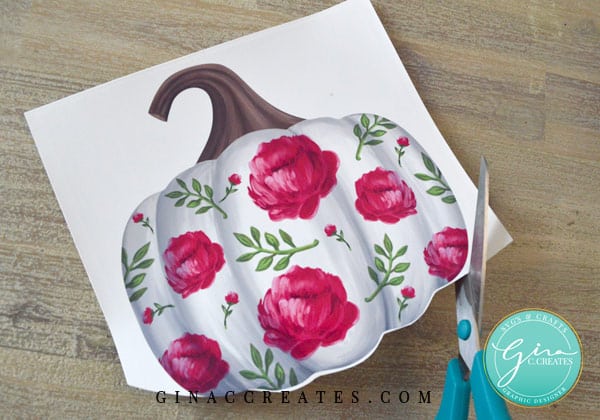
4. Cut out your image with scissors, you may leave a white halo around the image since the paper is transparent.
5. Soak decal in a pool of water for about 30 seconds, then remove from water.
6. Quickly apply your decal to your clean smooth surface. Then slowly remove the backing in one direction. You may slide and position your image to the right spot.
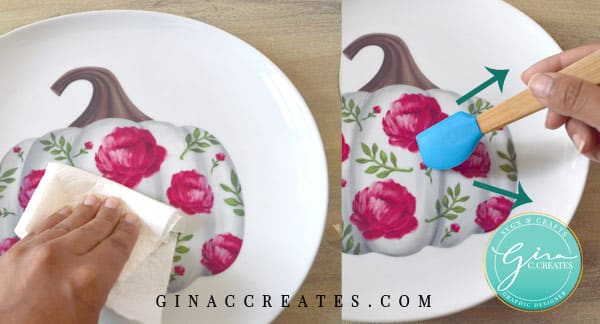
7. Once place correctly, dab with a paper towel to soak up some water and use your brush to smooth out any wrinkles. Start from the center and push outward. Do this until it’s completely smooth and dry.
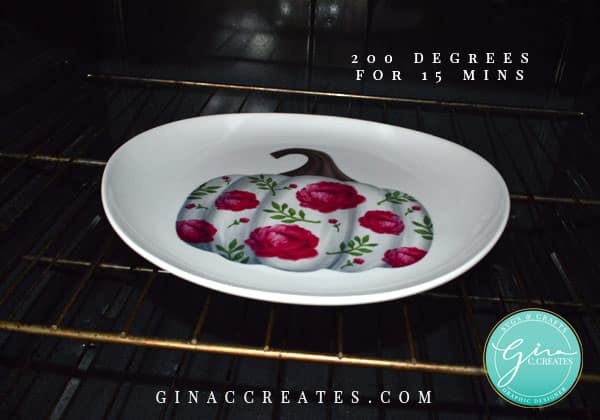
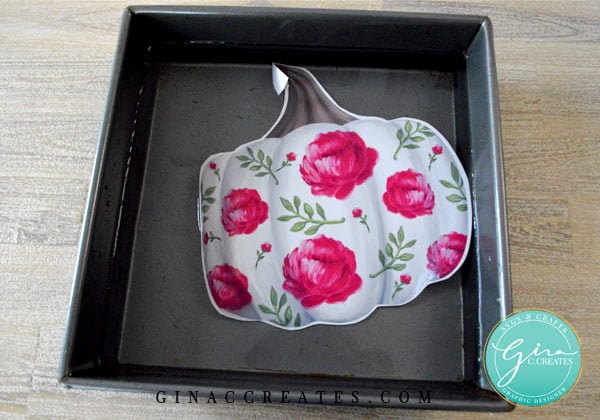
8. For ceramics only, you will need to bake at 200 degrees for 15 mins. This helps decal adhere to the plate. They are hand wash only and not dish washer safe. For other surfaces, a sealer will need to be used.
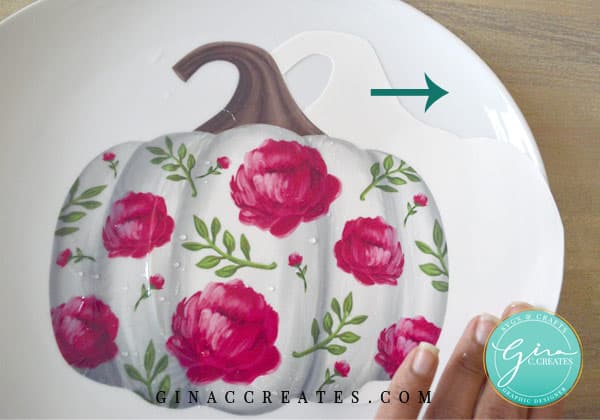
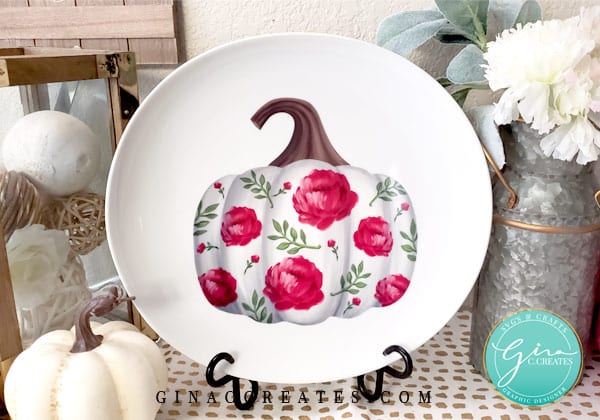
Here is the final product, and a lovely piece to my Fall decorations! I Hope you enjoyed this tutorial, let’s create with Gina C. Creates!
{Use circle icons below in Share Section}
Sharing to Pinterest, Facebook or Twitter, helps me tremendously by having others visit my post.


20 Responses
🌺🌼🌹Thank you for your excellent & detailed tutorial on the waterslide method. I am going to make some French labels for some of my pantry supplies, & I wanted to make see-through labels. Until now, I had never heard of waterslide paper! I will be showing my craft friends the end results & sharing your site!
Yay! I’m glad you found my tutorial helpful! Good luck on your project! It you have trouble just shoot me an email with any questions!
Hi Gina
What would you recommend for sealing the waterslide paper onto a plastic tumbler (both the clear one and the new color changing ones).
Thanks 🙂 Tina
Hello, to seal on plastic I would use epoxy/resin. To seal on a cup you will need a cup turner to have it rotate for 24 hours while the epoxy cures. Here are my 2 favs. https://amzn.to/2RdHNA5 https://amzn.to/3ijgYpT
Hi
I am using a plastic cup with the waterslide decal (the clear tumbler and the new color changing model) how do I seal the waterslide decal onto this?
Thank you
Tina 🙂
Is it possible to hand paint onto the decal then apply once dry? I paint with oils.
Not sure I never tried that. Let me know if that works!
I’m printing the image on a laser printer (to be used on a ceramic mug). Does it still need to sealed before applying, and/or “baked” after applying?
Not sure, I only used Ink Jet printer and for that we have to bake to seal. You might want to read the directions that came with the Laser printer paper.
hi, I’ve watched several videos of this waterslide decal and on one this woman said not to use a food oven for these decals, that if you use a food oven, you cannot use it for food again, because of the fumes? Can you comment on that please? Thanks
I wasn’t aware of this, can’t really comment on it. But I used mine, but obviously not at the same time as I cook. Oven was cleaned before I used it for food again. I don’t bake waterslides on a regular, but if you do it for a business and do it often you might want to get a small oven for that purpose.
Can I just use a spray sealer over my image instead of epoxy?
I haven’t tried that. If you can’t bake it, I usually seal with epoxy. Which is the best way to protect your waterslide since it is very delicate.
Can waterslides be used on the color changing plastic cups? what do use to seal if needed?
You can use Epoxy resin, which is the best thing to seal waterslides. They are very delicate.
When appling waterslide onto plastic cups do I put resin over just the image and put under the lamp or apply over the whole cup? Thank you in advance. Or will just spraying with the sealer good?
Hello, to seal a waterslide on a cup the best thing to do is to seal it with resin over the whole cup, you will need a tumbler turner and regular 24hour resin/epoxy. Not UV resin.
What sealer did I use for keeping g waterslides on plastic cups
It’s best to seal the whole cup with resin after you applied the waterslide.
i have found that dupli color makes a flexble acrylic lacquer clear for interiors so there is no cracking of the clear coat on the decals. trust me youll love it. find it at local parts stores that carry duplicolor.