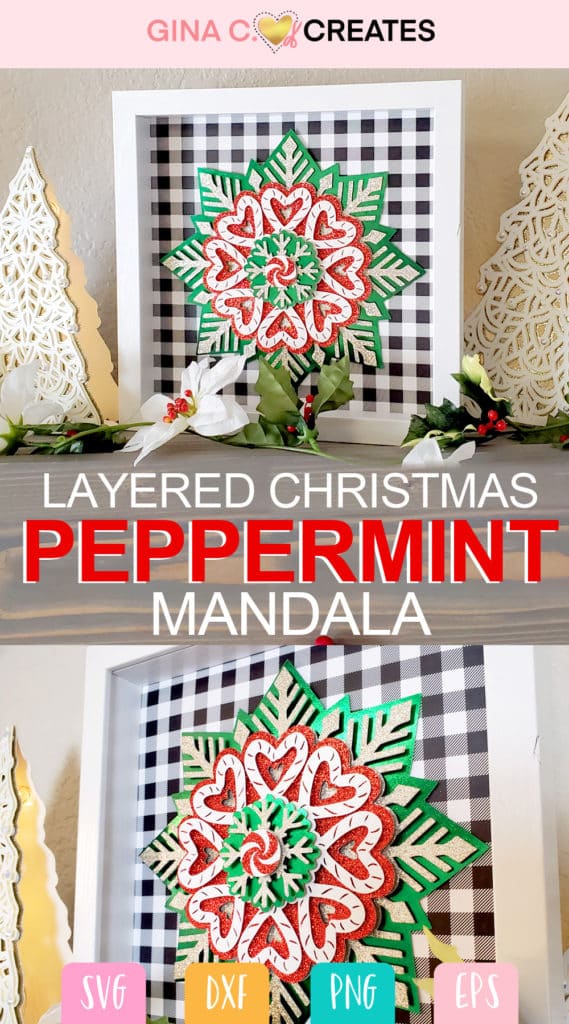
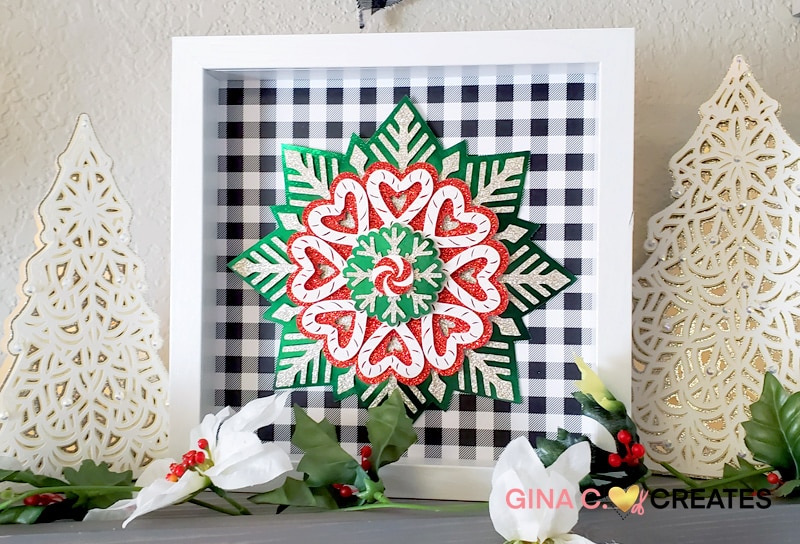
Christmas Peppermint Layered Mandala Cricut Craft
Hello Crafters, today I have this Christmas Mandala design for you! It’s a holiday version inspired by my 3D Hope Love Faith Mandala! It’s very simple to make with your Cricut, cardstock and foam tape. I will show you how to make this gorgeous Christmas Peppermint Mandala into a festive DIY Christmas decoration.
Optional List:
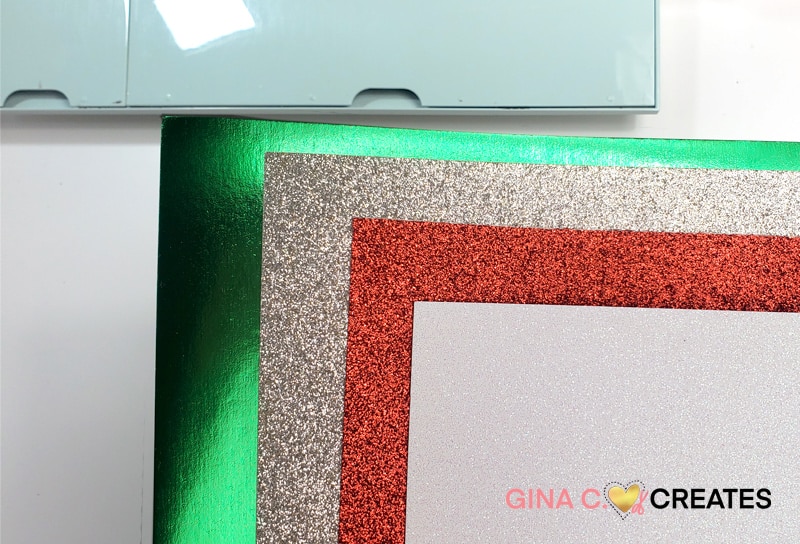
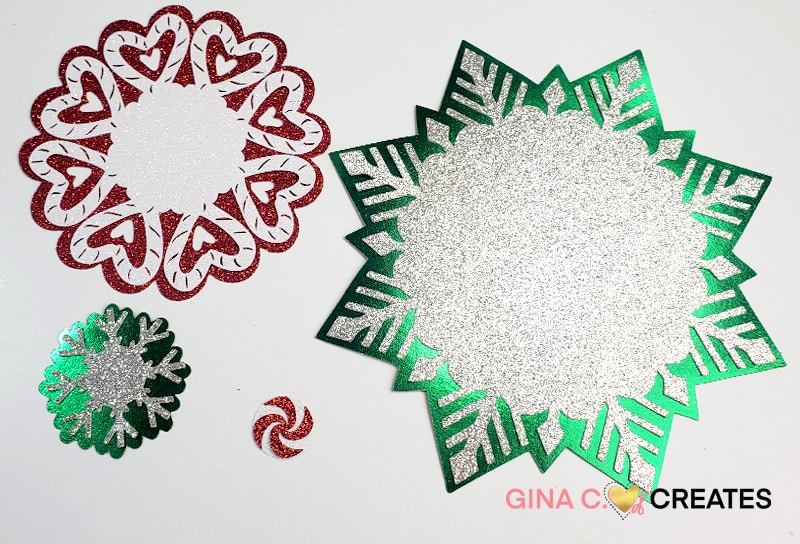
Here are the 4 cardstock sheets I used. Foil Green, Sliver Glitter, Red Glitter and White Glitter Cardstock!
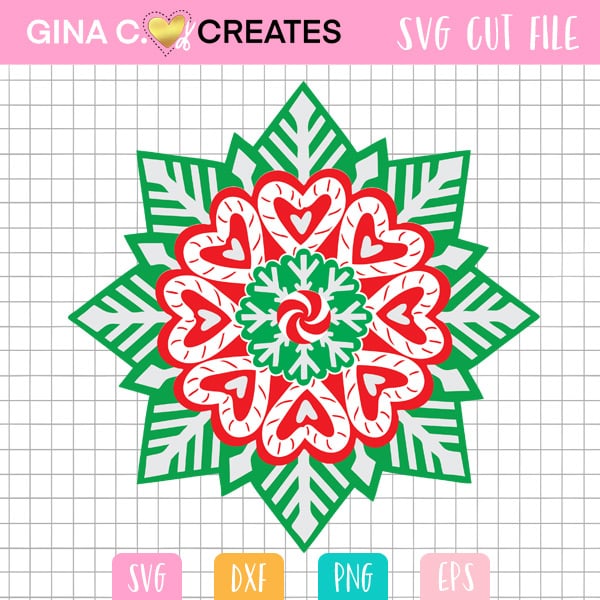
Once you have my SVG downloaded, upload it to Design Space. You can grab the freebie at the end of this post.
The SVG file will be in color and contain layers in the layer palette to the left. If yours doesn’t look like mine, please refer to my Q&A page on how to upload the correct file. Also check the size of the SVG, Design Space can glitch and not always upload an outside SVG the correct size. This SVG is designed at 8×8 for a 9×9 shadow box. However, you can resize this to your liking, depending on your project.
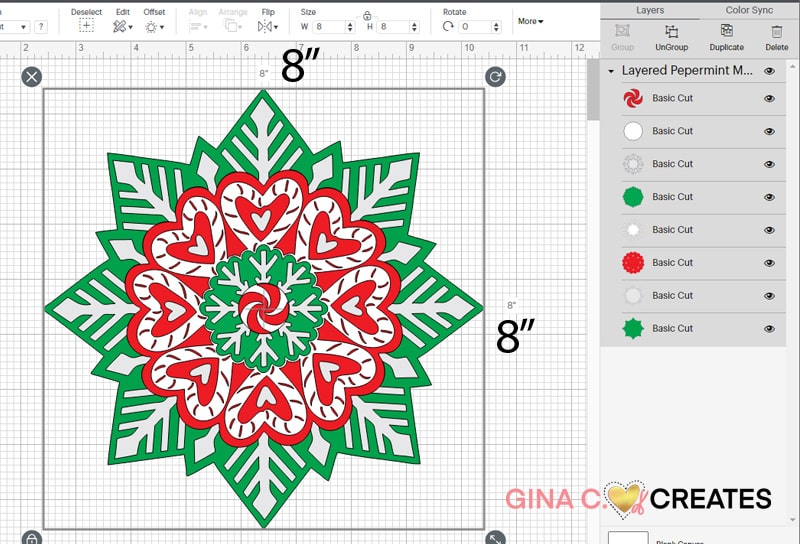
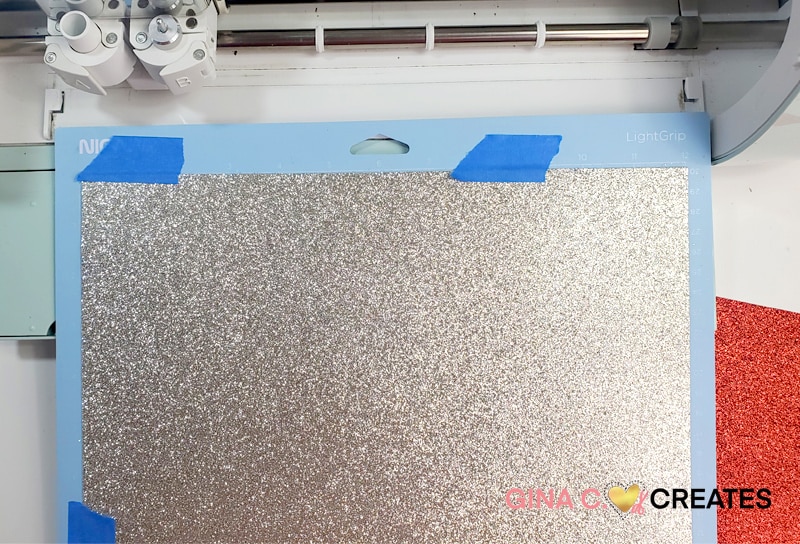
Other than changing the colors, this SVG design is ready to cut! Click Make It and adjust your dial to the correct cut settings for your material. I cut on Custom>Glitter Cardstock for my glitter cardstock and on Cardstock+ for my foil cardstock. I also use blue painters tape to hold my cardstock in place, this is a neat trick so your cardstock won’t accidently shift around.
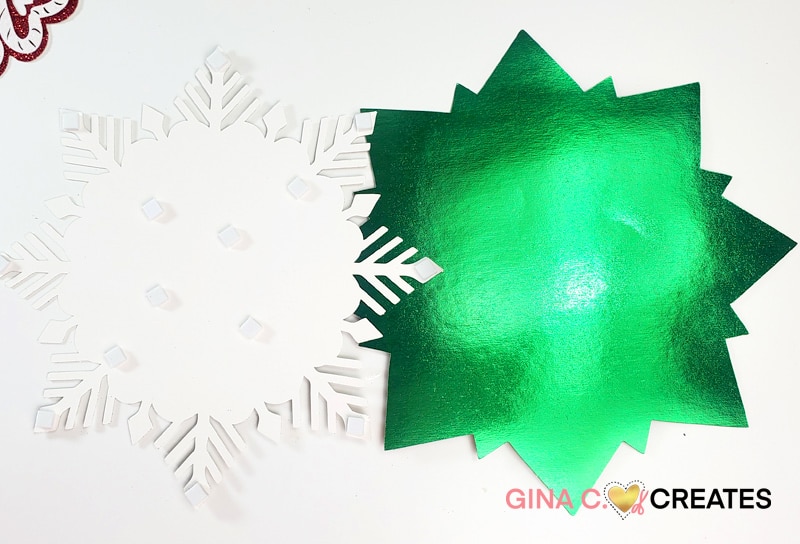
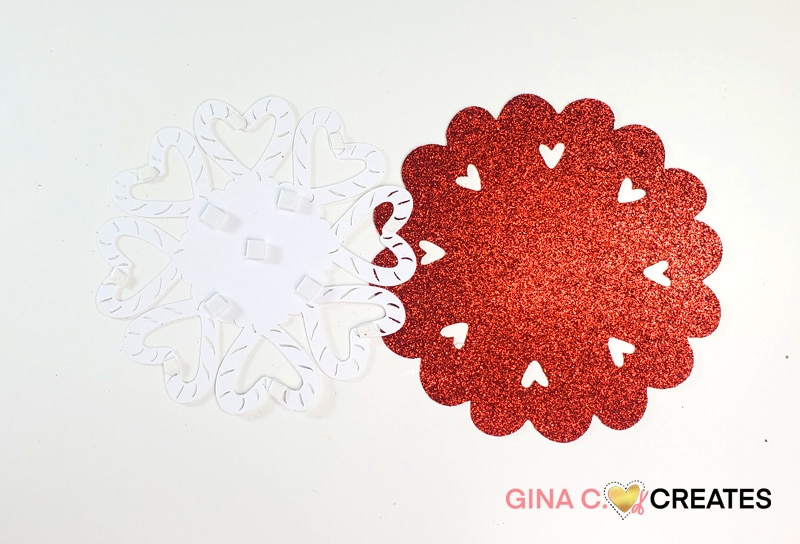
Once you have all your layers cut out, you can begin to assemble. Organize them by pair with their matching back piece.
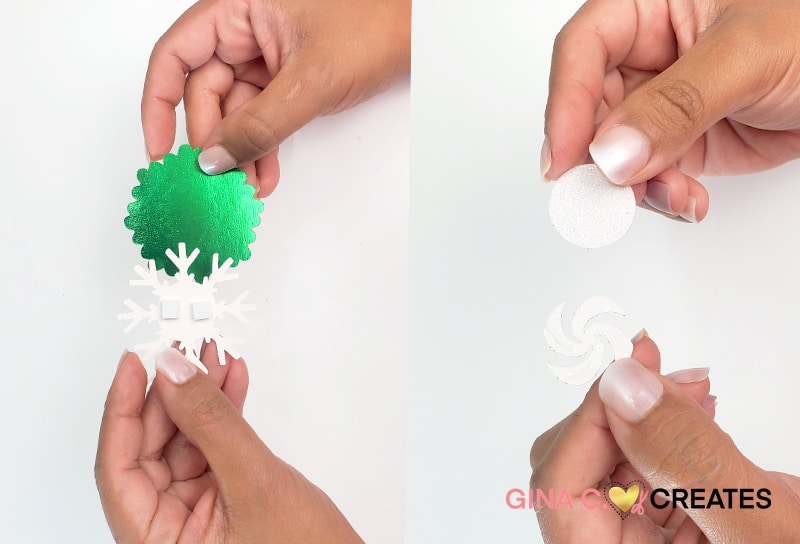
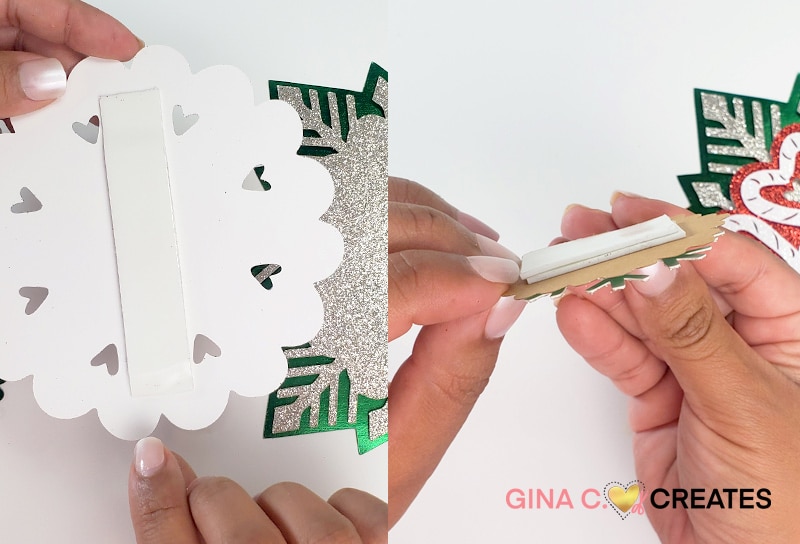
I layer all the pairs together first, before I stack the entire thing, using foam tape.
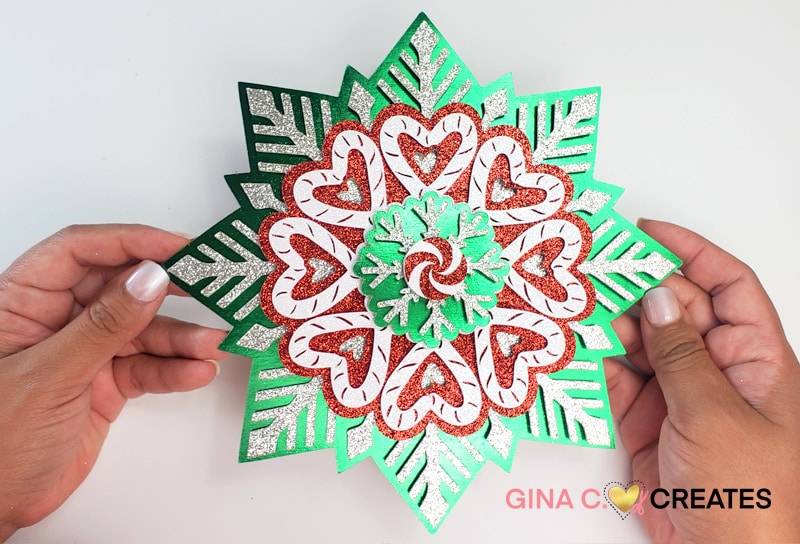
For the top circle peppermint I layered together with craft glue.
Now it is time to stack the pairs together. For this I used 2 layers of foam tape on top of each other. This will give it more depth in between layers.
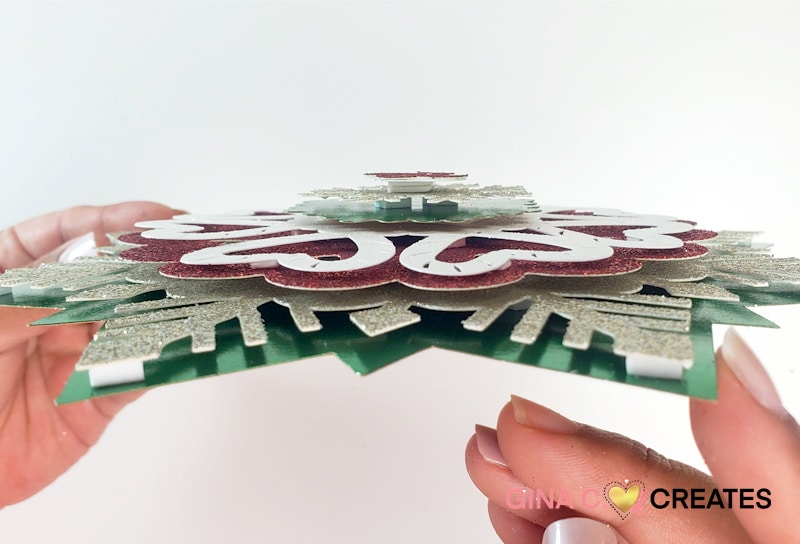
Now we have the Christmas Peppermint Mandala fully assembled and next we can add it to the shadow box.
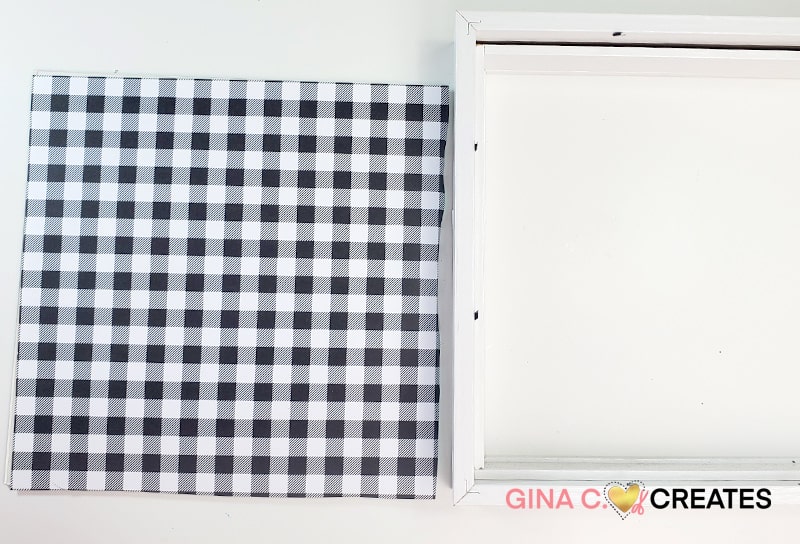
Take your patterned 12×12 cardstock and cut it down to fit your shadow box backing. Place the shadow box backing over your 12×12 cardstock and trace it out. Trim it to the trace and use tape or hot glue to adhere it to the backing. I used foam tape to add the mandala to my shadow box, over the pattern cardstock. Next, place the backing back into your shadow box.
I hope you enjoyed this tutorial! And add this beautiful decoration to your home this holiday season!


5 Responses
Thank you for sharing!!! Loved making this!!
Thank you so much, love it
Beautiful! Thank you!
Love it! What are the trees that you have beside the framed peppermint mandala?
They are my Layered Light up Christmas Trees, you can find that project here!