It is time for some easy DIY Easter decor, let your creativity run wild as we create faux clay jumbo Easter eggs to decorate your home! Add a touch of homemade charm to your Easter holiday celebration. We are going to give decorative egg painting a new meaning!
In this tutorial, I’ll show you step-by-step on how to create a terracotta-inspired faux clay jumbo Easter egg. Whether you’re an active DIY crafter or a seasonal DIY enthusiast, this simple faux clay egg tutorial will lead you through the process of transforming cheap plastic eggs into modern Easter egg decor using household supplies. With your touch of creativity, we’re going to make affordable Easter decor look more expensive!
Great ready to discover the joy of painting Easter eggs again, that will not only make your home festive, but be a token of your creativity, and festive spirit! You might also like my DIY Easter Felt Accents Tutorial!
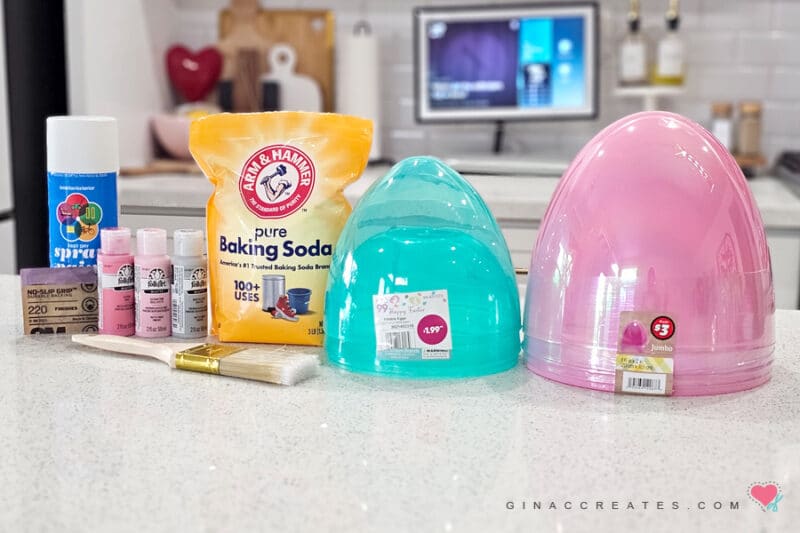
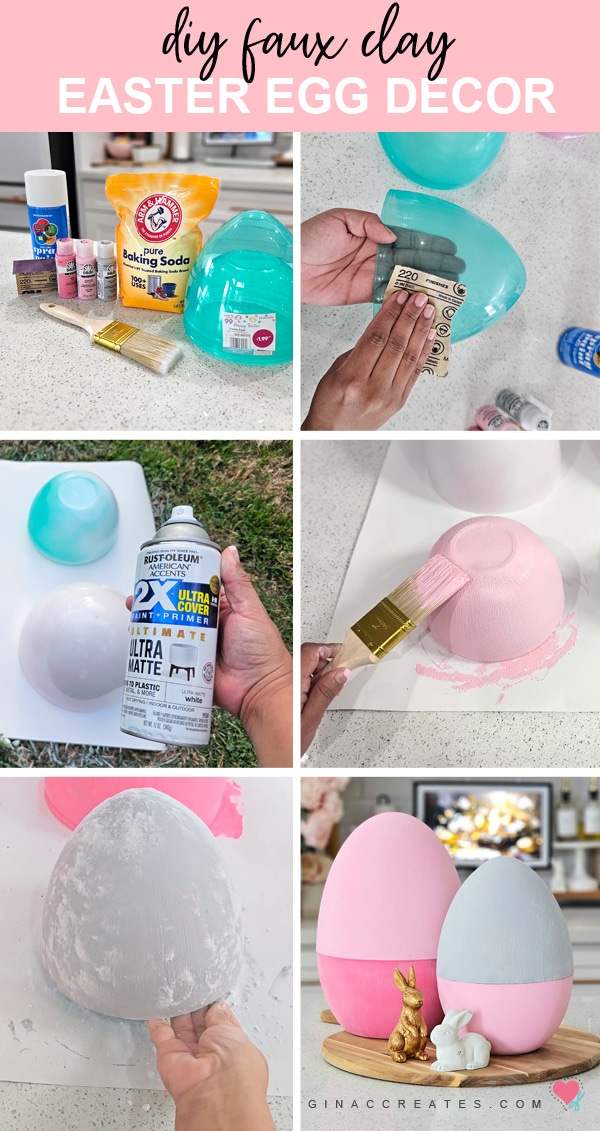
No need to spend the big bucks on oversized decorative eggs, when you can find most of these supplies at the Dollar Tree! Take a look at these alterative supplies found at the Dollar Tree to create the same faux clay look!
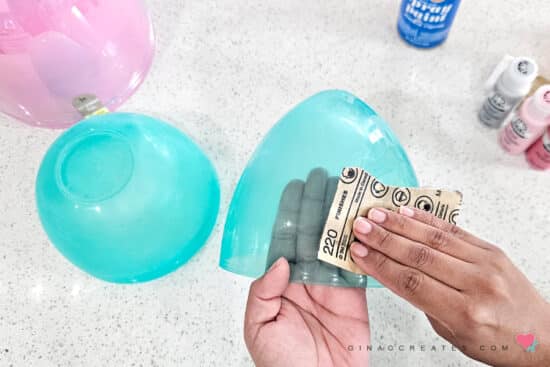
Prepping the surface is always an essential step when it coming to painting certain materials, and plastic is no exception. Use a 220 grit sand paper and buff out the shine of the jumbo Easter egg. Make sure to do this over the entire surface where you are going to apply paint. This will help your paint stick to the surface and keep it from chipping off!
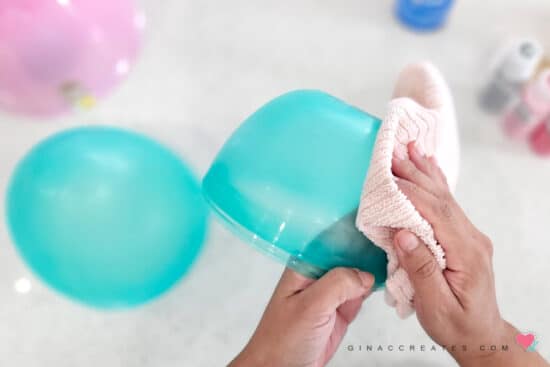
After sanding, get a damp cloth and clean the entire surface until it is free from dust and debris.
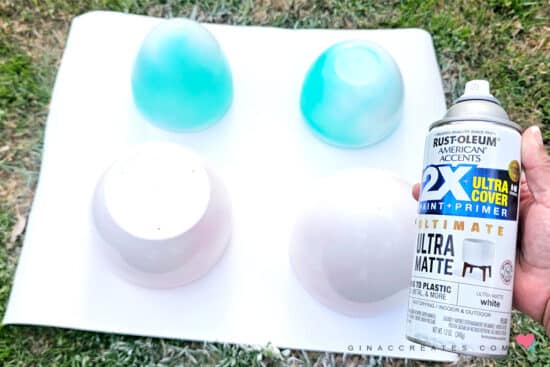
Give it a base coat with white spray paint. I used an ultra matte white that has primer in it. Depending on your plastic egg, this will give it a nice solid look and not be transparent. It will also provide a base coat so your choice of color paint will come out it’s true color. Spray your eggs outside or a space with plenty of ventilation. Allow a couple hours to dry before moving on.
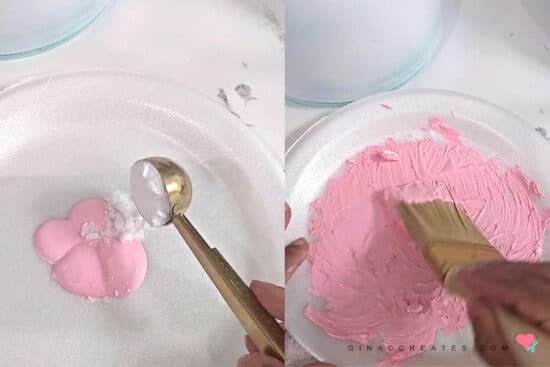
Once your spray paint coat is done drying, it’s time to paint the jumbo egg your choice of color. I wanted it to look like clay of some sort with the terracotta clay texture, so this is where I’m using Baking Soda with my acrylic paint to give it a thicker texture.
Mix half paint and half baking soda until it’s a thick consistency.
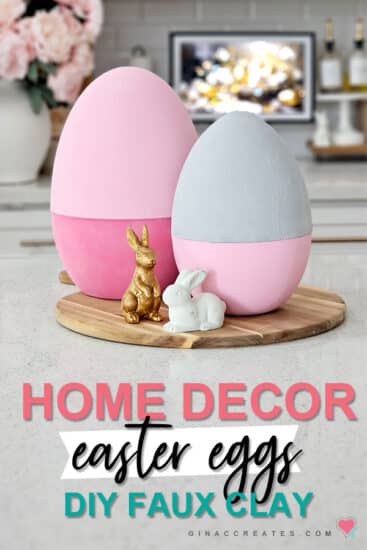
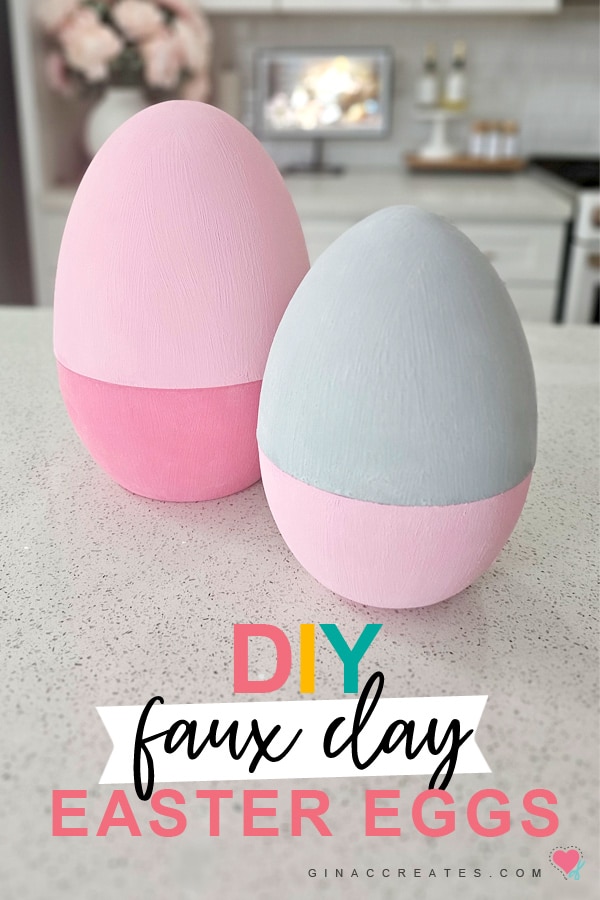
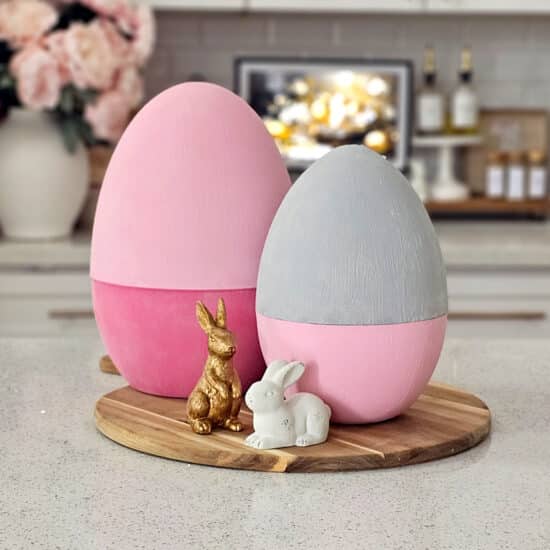
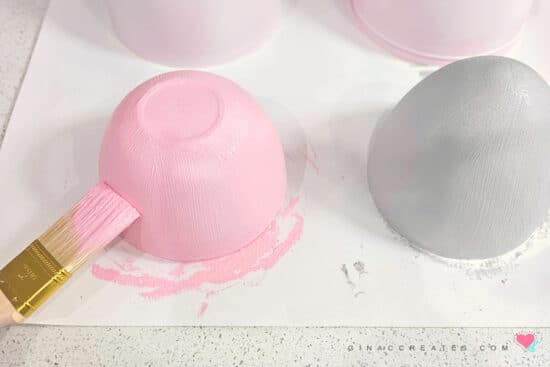
I brushed on the paint with vertical stroke marks going in the same direction. You may need 2 coats depending on your paint. I decided to do my eggs different colors for the top and bottom half so the seam of the egg where it snaps together, isn’t as noticeable, I felt it will look more intend.
Feel free to create your own texture with the bristle brush and choice of colored paint. This is where your creativity comes into play, add patterns or design to match your own Easter decor!
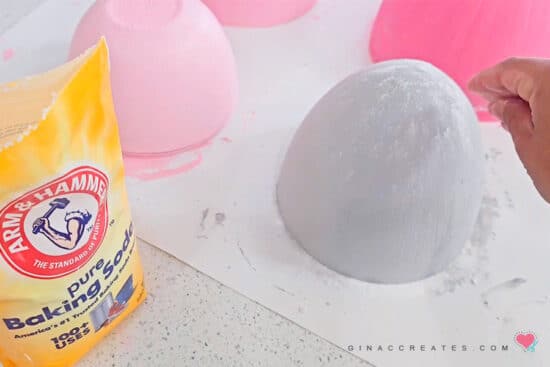
Before your paint completely dries, sprinkle on some baking soda to give it a rustic look. Allow it to dry completely, then take a dry brush or paper towel to brush off excess baking soda. You can brush off as much as you like until you achieve desired look.
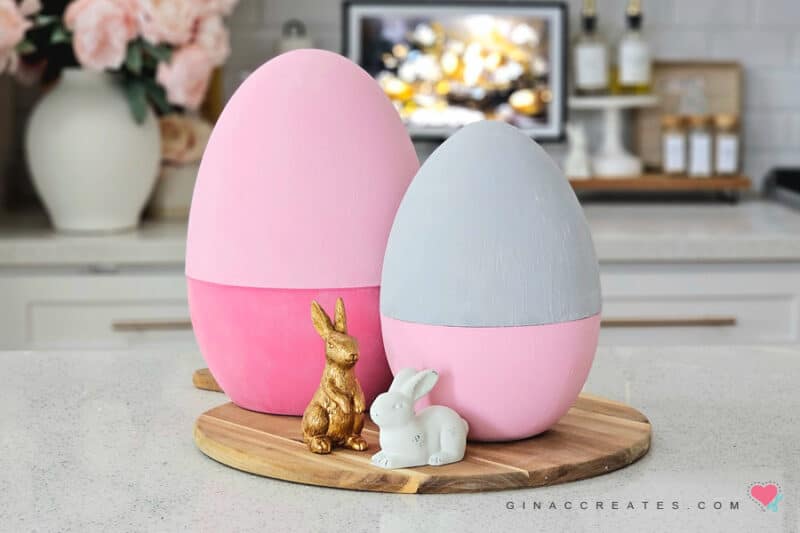
Lastly, gently snap your jumbo egg back together. The paint did have some flexibility and didn’t take much force, just handle with care and take your time!
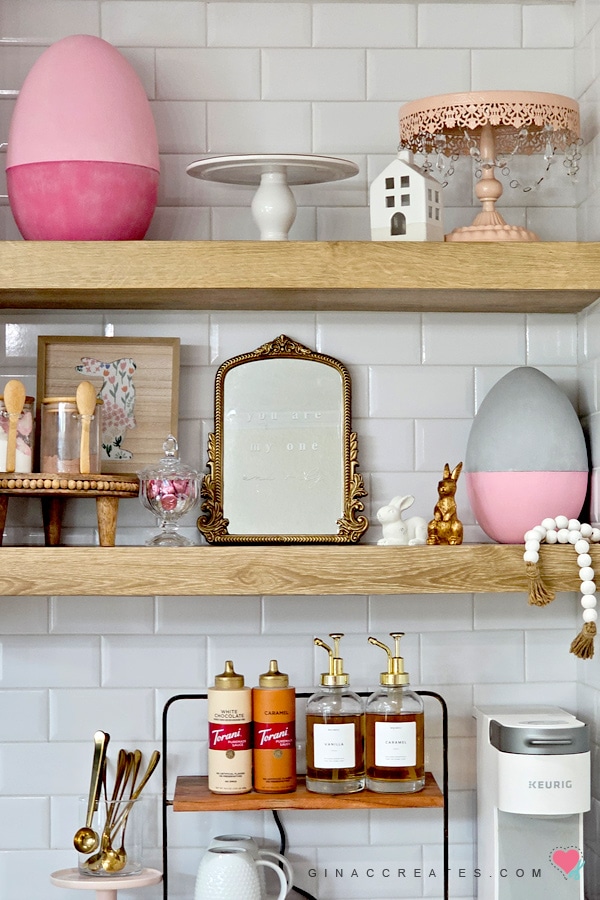
These jumbo faux clay Easter eggs are the perfect size for home accents! Place them on a wooden tray with ceramic bunnies or spring flowers! Or add them up high to floating shelves and bookcases. Another great spot is to place them under your mantel, in front of your fireplace!
Save this image gallery for later by pinning it to Pinterest!
Now that you breezed through my step-by-step tutorial on how to make faux clay Easter egg decor, I hope I sparked your creative juices to make one for your home! This handcrafted gems are more then just decor, they are a part of you! Make it a fun Easter tradition the whole family can enjoy! Before you go, check out some of my Cricut Easter Crafts!
Make sure to share your creation with others and tag me at @ginaccreates so I can see your creativity!